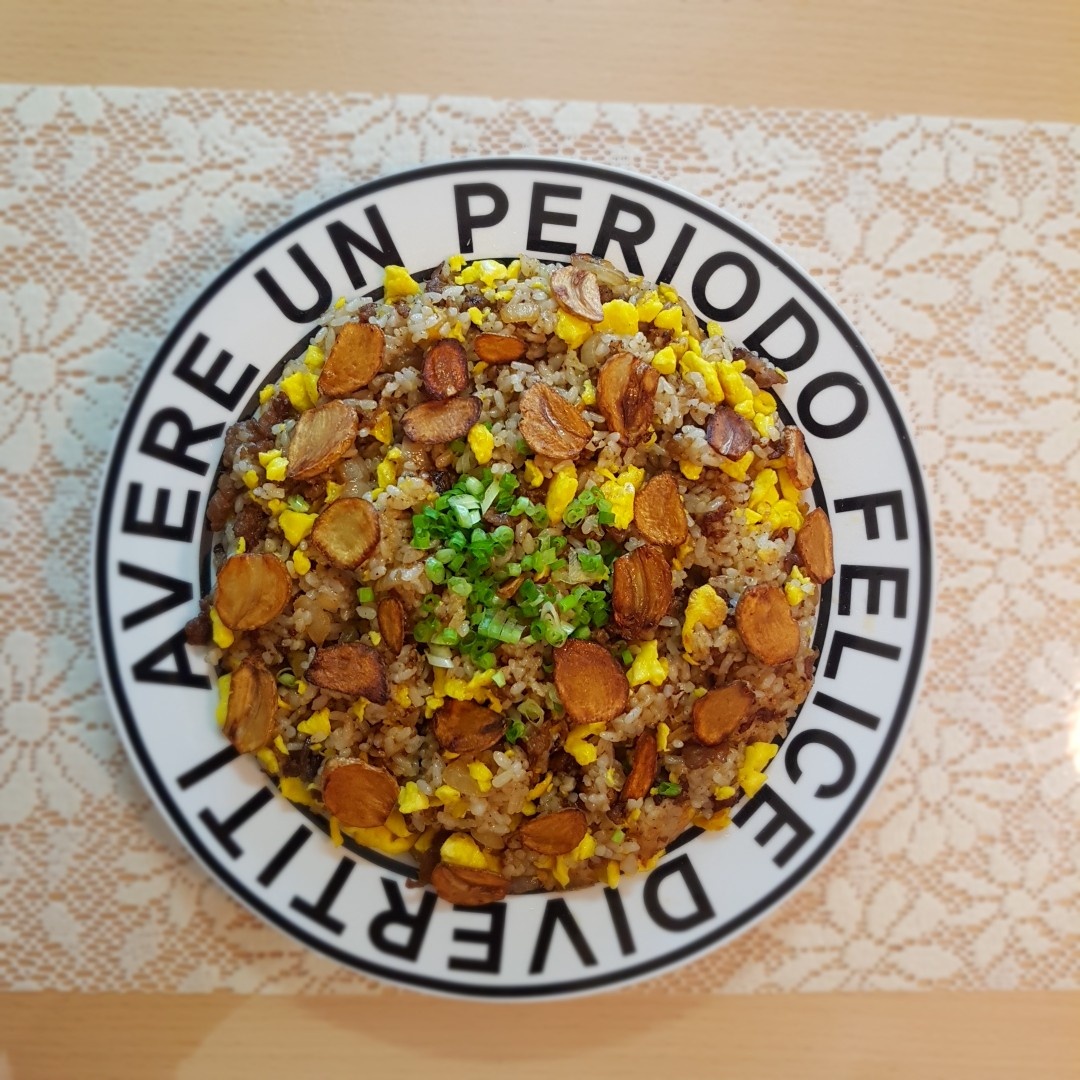
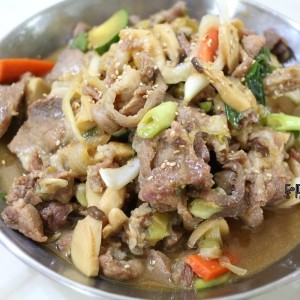
Korean beef brisket fried rice (Chadol rice)
The Essence of Sweet and Salty!
It's Korean beef brisket fried rice flavored with garlic and green onions.
You can enjoy a savory meal with a small amount of Korean beef brisket^^
2 serving
Within 30 minutes
Jv
- Ingredients
-
-
Beef brisket200g
-
instant rice2bowl
-
Garlic5ea
-
leek1/2piece
-
Scallions
-
onion1/4ea
-
Eggs2ea
-
thick soy sauce3TS
-
Sugar1/2TS
-
olive oil3TS
-
red pepper oil1TS
-
ground pepperlittle
-
- Cooking Steps
-
STEP 1/12Preparing ingredients.
Chop the onion into small pieces, slice the garlic into small pieces, spread the rice and cool it down. Cold rice is better.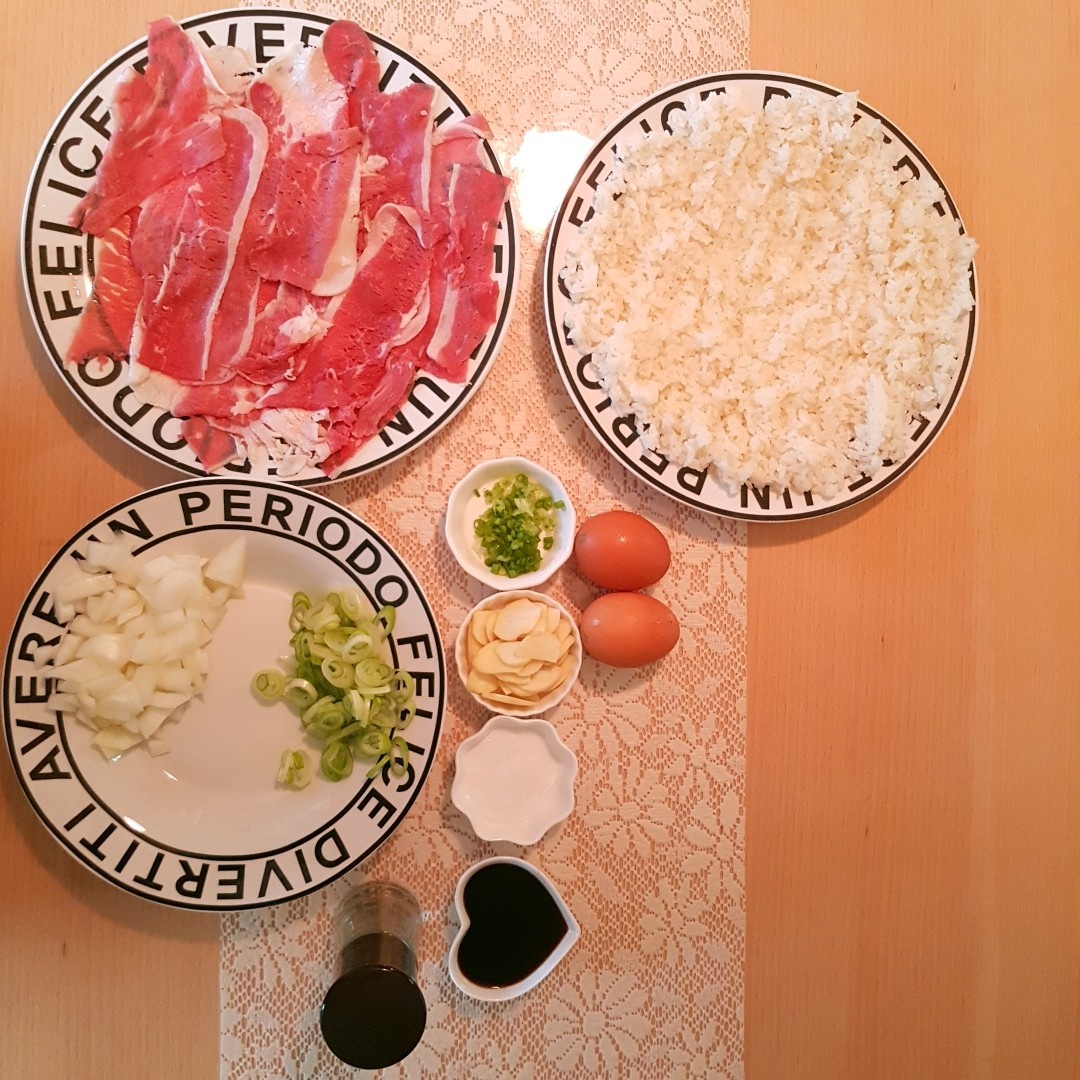 STEP 2/12Seasoning Korean beef brisket.
Season beef brisket with a little pepper and half a tablespoon of sugar.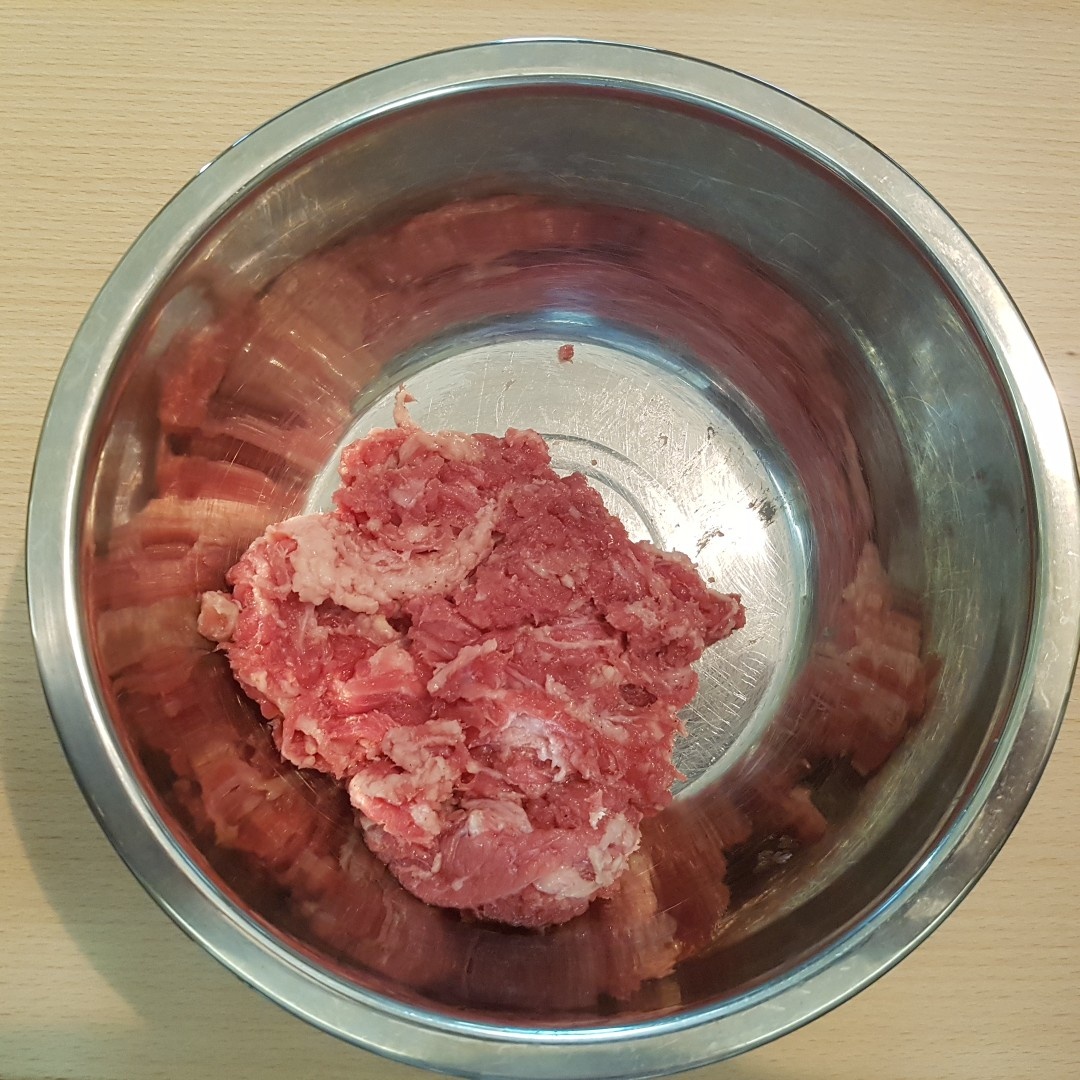 STEP 3/12Making egg garnish.
First, beat the eggs and fry them in oil. If you stir-fry it quickly on high heat, it becomes a moist egg garnish.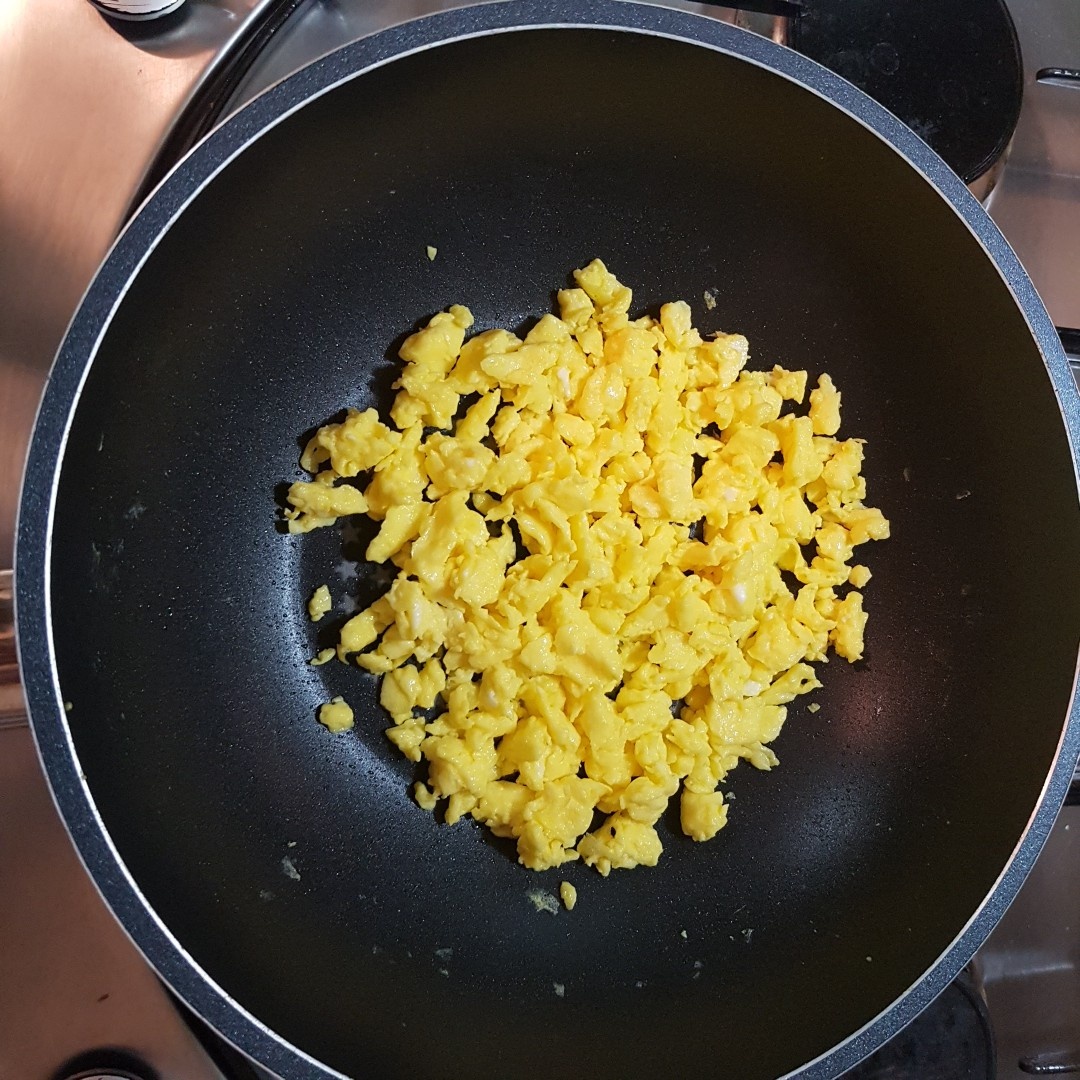 STEP 4/12Making garlic chips.
Stir-fry garlic in 3 tablespoons of olive oil (replaceable oil) to make garlic chips. STEP 5/12Remove the garlic chips separately and cool them to a crisp, and stir-fry green onions in the remaining oil to make parmalade oil.
 STEP 6/12Making parmalade oil.
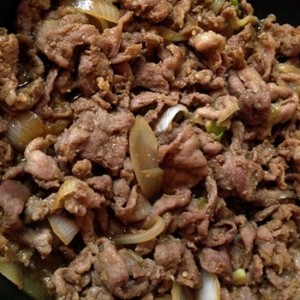
Stir-fry garlic in oil and stir-fry until green onions are lightly golden brown. STEP 7/12Stir-fry Korean beef brisket.
Add marinated beef brisket when green onions are golden! STEP 8/12When beef brisket becomes golden and enough meat oil comes up, push the meat to one side, add 1 tablespoon of pepper oil and 3 tablespoon of soy sauce, and press it in the oil.
(It's better to take the meat off the pan at this time.) STEP 9/12Stir-fry the meat in the pressed soy sauce seasoning, then add the onion and stir-fry together.
 STEP 10/12Stir-fry rice.
If the onion color changes slightly, add the cooled rice and stir-fry it together.
Turn off the gas stove and mix well with the meat seasoning and rice. STEP 11/12Add egg garnish and stir-fry.
When the fried rice is almost done, add egg garnish and stir-fry a little more. You need to put the egg garnish at the end to make the yellow look pretty.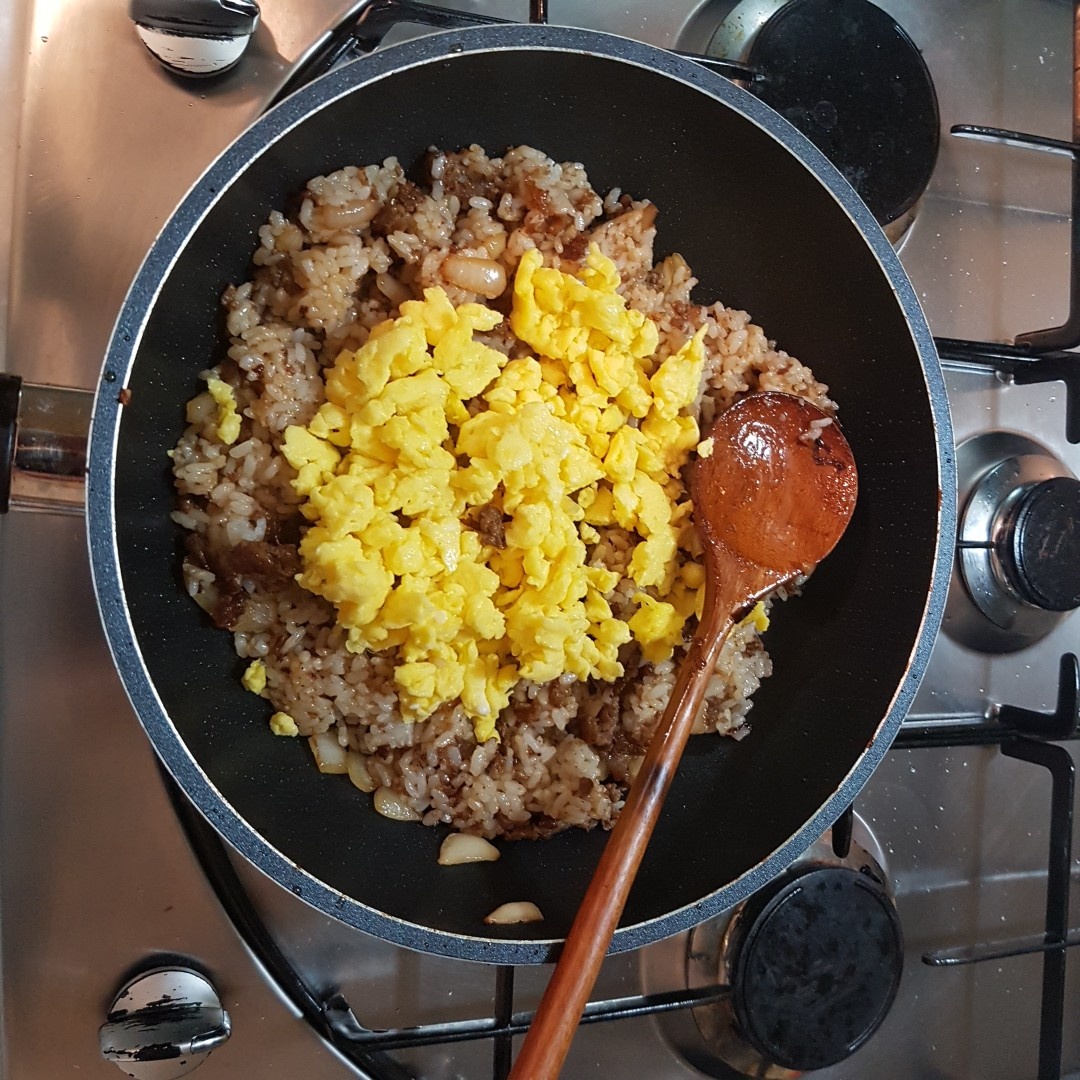 STEP 12/12Stir-fry it as shown in the picture, then put it in a bowl and shape it with the garlic chips and chives that you made first.
 1. You can adjust the amount of sugar to your liking, but if it's over a tablespoon, it becomes too sweet. 2. If you don't have chili oil, you can replace it with red pepper powder (1 tablespoon) or pepperoncino (1 piece). It's cleaner with chili oil, but it tastes better without it. 3. Dark soy sauce is good, but it tastes better if you add seasoned soy sauce.
- Cooking review
-
5.00score
-
 245*****scoreIt's really easy and delicious. It's really good even if it's a beginner like me. Make sure you eat it. I didn't have beef brisket, so I made beef brisket in layers, and that's really good, too. If you prepare something slightly spicy and eat it together, it's really delicious2020-03-21 15:50
-
- stir-fried Rice Cake Recommended recipe
-
-
1
 Soy sauce tteok-bokki. Good for kids, good snacks4.68(34)
 -
2
 Oh, soy sauce tteokbokki4.94(166)
 -
3
 [Simple home cooking] 90% synchro rate, making Shinjeon tteokbok4.73(171)
 -
4
 Golden recipe for tteokbokki with soup It's really sweet4.68(53)
-
- Bulgogi Recommended recipe
-
-
1
 Jongwon Baek pork belly bulgogi4.91(88)
 -
2
 Yoon's Kitchen Bulgogi Sauce, 3 kinds of bulgogi dishes4.95(40)
 -
3
 How to make Soy Sauce Pork Bulgogi with A Side Dish4.93(233)
 -
4
 Pork Soy Sauce Bulgogi:: Pork Bulgogi, which you can enjoy a lot4.91(76)
-