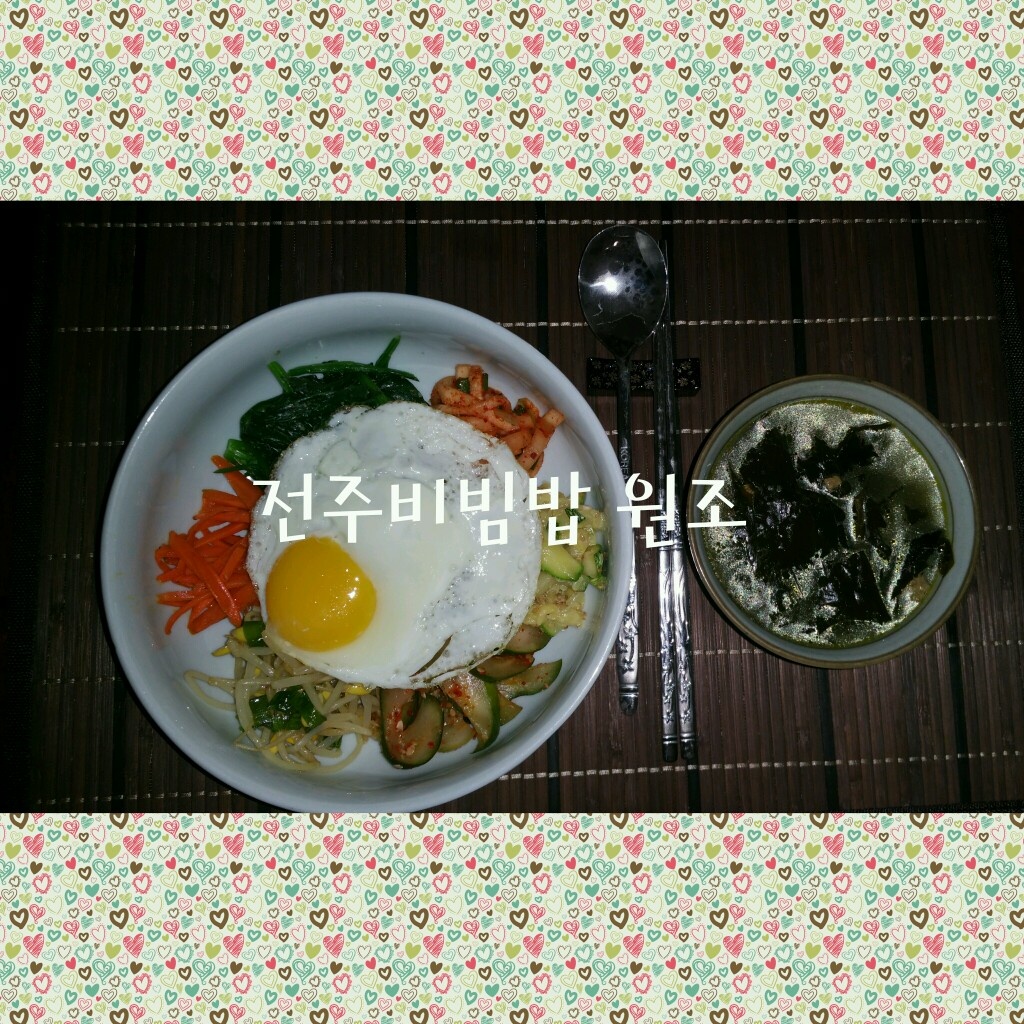
Jeonju Bibimbap. Food for my mom that I learned from my mom who
My mother, whose hometown is Jeonju, has exceptionally good food skills and thinks health is important, so my refrigerator always had 3-4 side dishes of stir-fried red pepper paste and various vegetables, as well as other side dishes, and thanks to that, I could easily make bibimbap easily. Everyone has a "I want to eat my mom's signature menu, OOO," but I think bibimbap is the best. When I became a mother, I realized that it was not only necessary for skill but also for diligence and sincerity. Just in time, my mother's birthday is just 10 days away, so I organize the vegetables in traditional Jeonju bibimbap with my mother's recipe. I'd like to send it to you by overseas delivery
4 serving
Within 999 minutes
EasyFusion집밥er
- Ingredients
-
-
Steamed beef250g
-
red pepper paste
-
Cucumber10ea
-
Radish1ea
-
Pumpkin5ea
-
Spinach2pack
-
Bean sprouts450g
-
Carrot5ea
-
crushed garlic
-
leek
-
Salt
-
a thick salt
-
Sugar
-
Honey
-
plum extract
-
salted shrimp
-
salted anchovies
-
Thick red pepper powder
-
sesame salt
-
Sesame oil
-
Cooking oil
-
Vinegar
-
- Cooking Steps
-
STEP 1/30[Stir-fried red pepper paste] Put the meat the size of an adult's fist into a pan, break it, and cook it. Add chopped green onion in equal volume
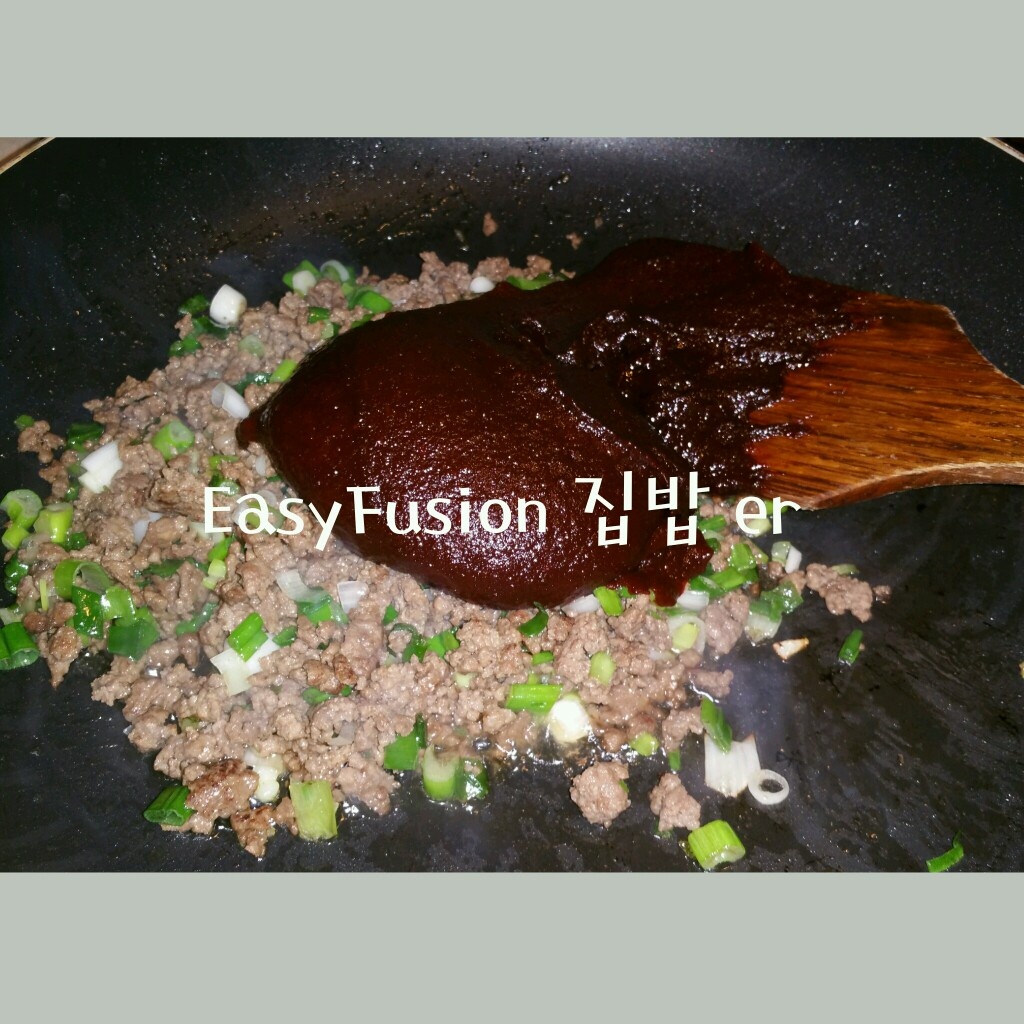 STEP 2/30Add 1T of honey, 1T of plum extract, 1T of sesame oil, and the equivalent amount of red pepper paste and stir-fry until well mixed.
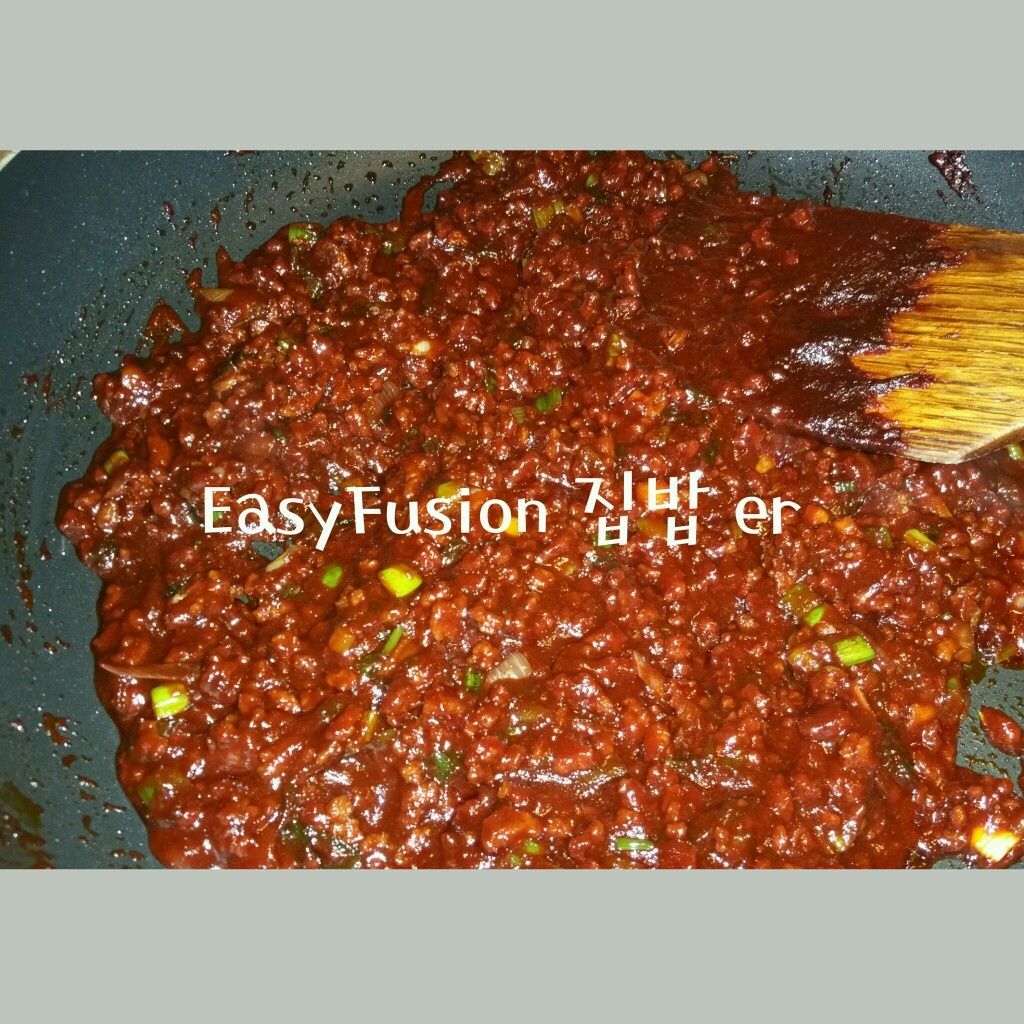 STEP 3/30[Stir-fried red pepper paste] It's traditional to have beef tartare in Jeonju bibimbap. However, since it is not easy to make bibimbap with raw beef at home, we replace it with simple meat in stir-fried red pepper paste.
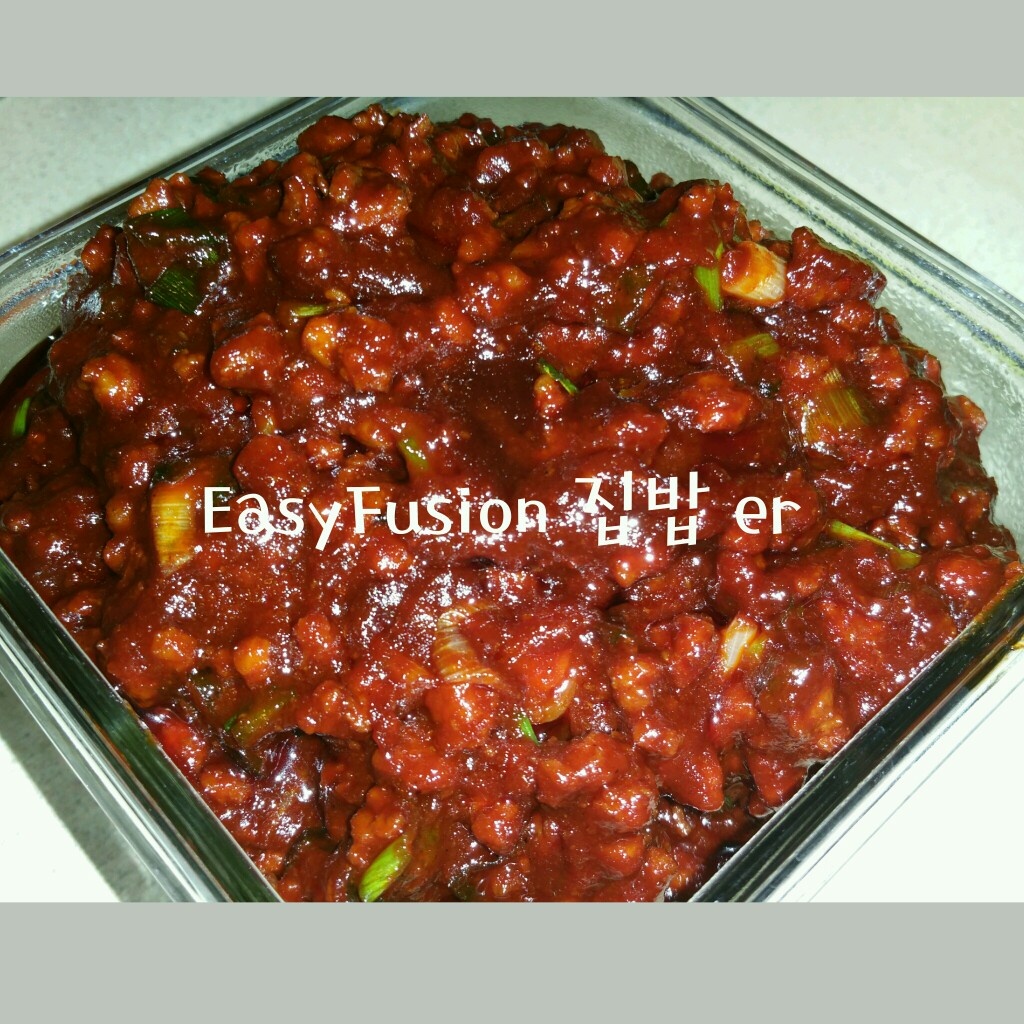 STEP 4/30[Seasoned cucumber] Cut the cucumber in half and cut it diagonally. I bought 10 pickle cucumbers because I didn't have them, but I tried to mix them half and stir-fry them half, but they all did. I don't think it's bad to mix a bit of sour taste, but it's called cucumber belly, so it's better to stir-fry pickled cucumbers with simple meat. I like both, but this time, with seasoned... It was about six long pieces of common Joseon cucumber. If you don't want to do a lot, please reduce the amount according to the ratio.
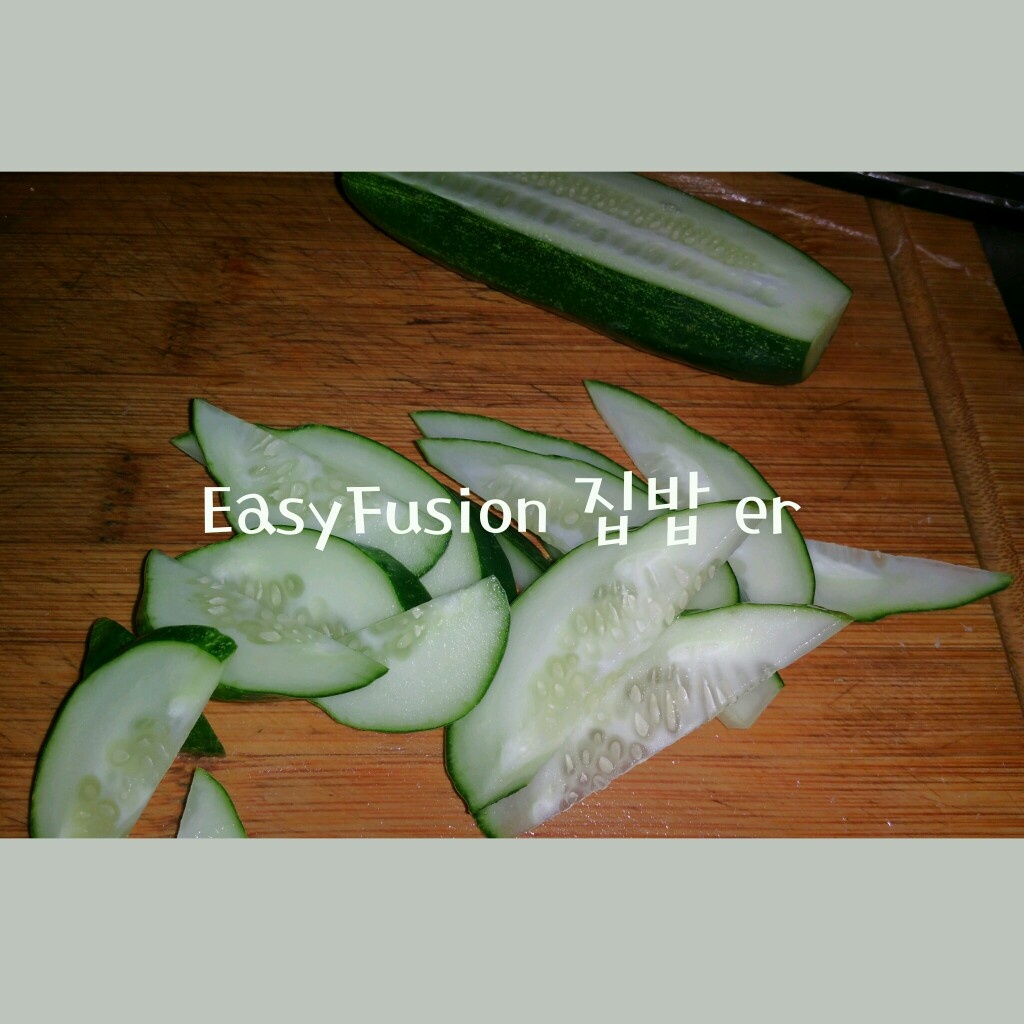 STEP 5/30[Seasoned cucumber] Add a lot of salt and marinate the sliced cucumber. When the cucumber is less salted, not only does the water come out after the seasoning continue to come out, but it also becomes tasteless because the seasoning flows down. Increase the amount of salt to make it sufficiently salted in a short time, and if you have more than an hour to pickle, sprinkle moderately.
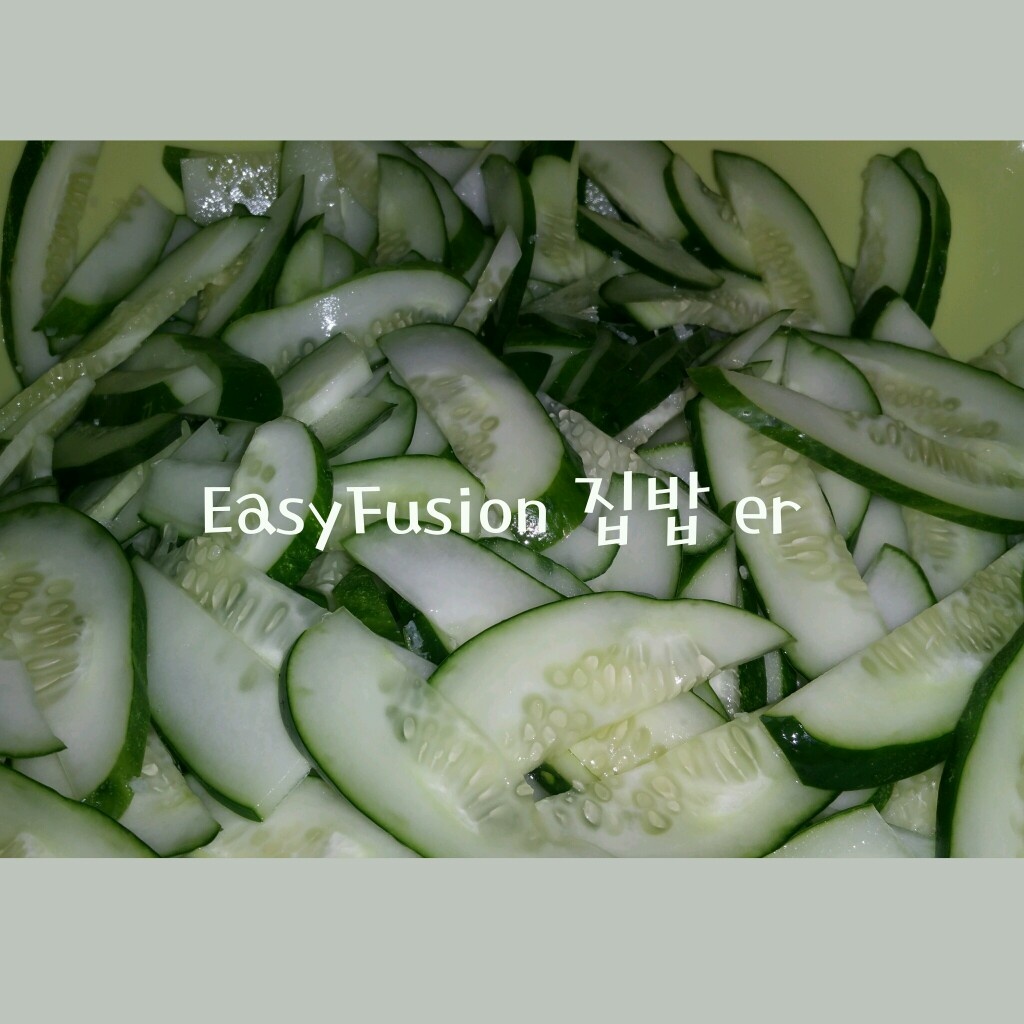 STEP 6/30[Seasoned cucumber] I think it took 2 hours to prepare other ingredients and cook. But it wasn't salty. Wash it with water and squeeze it before you eat it. If you just eat it and it's okay, it's well salted.
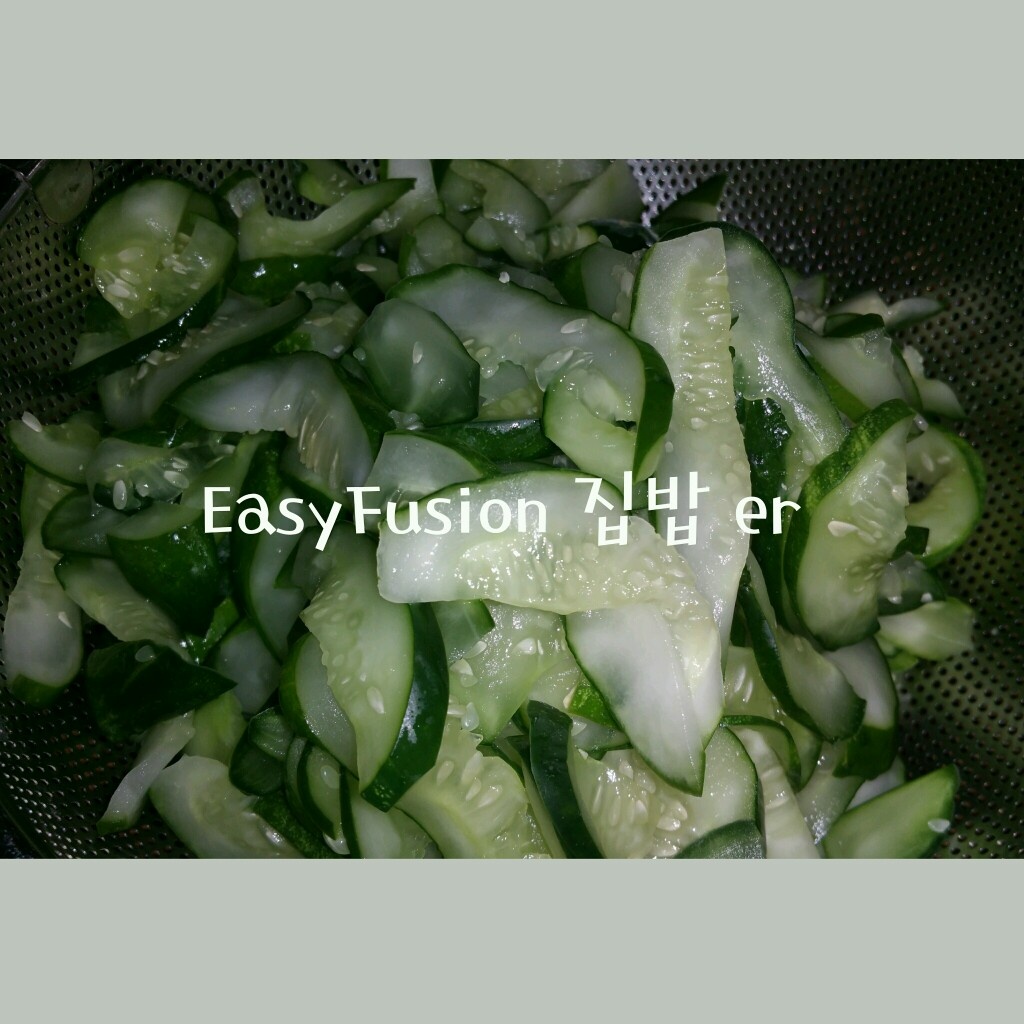 STEP 7/30[Seasoned cucumber] Put 2T of chili powder, 2T of sesame salt (or stir-fried sesame) 2T, 5T of vinegar, 1T of sugar, 1T of anchovy sauce, 5T of chopped green onion, and 1t of ground garlic in a pickled cucumber that has been squeezed well and rubbed.
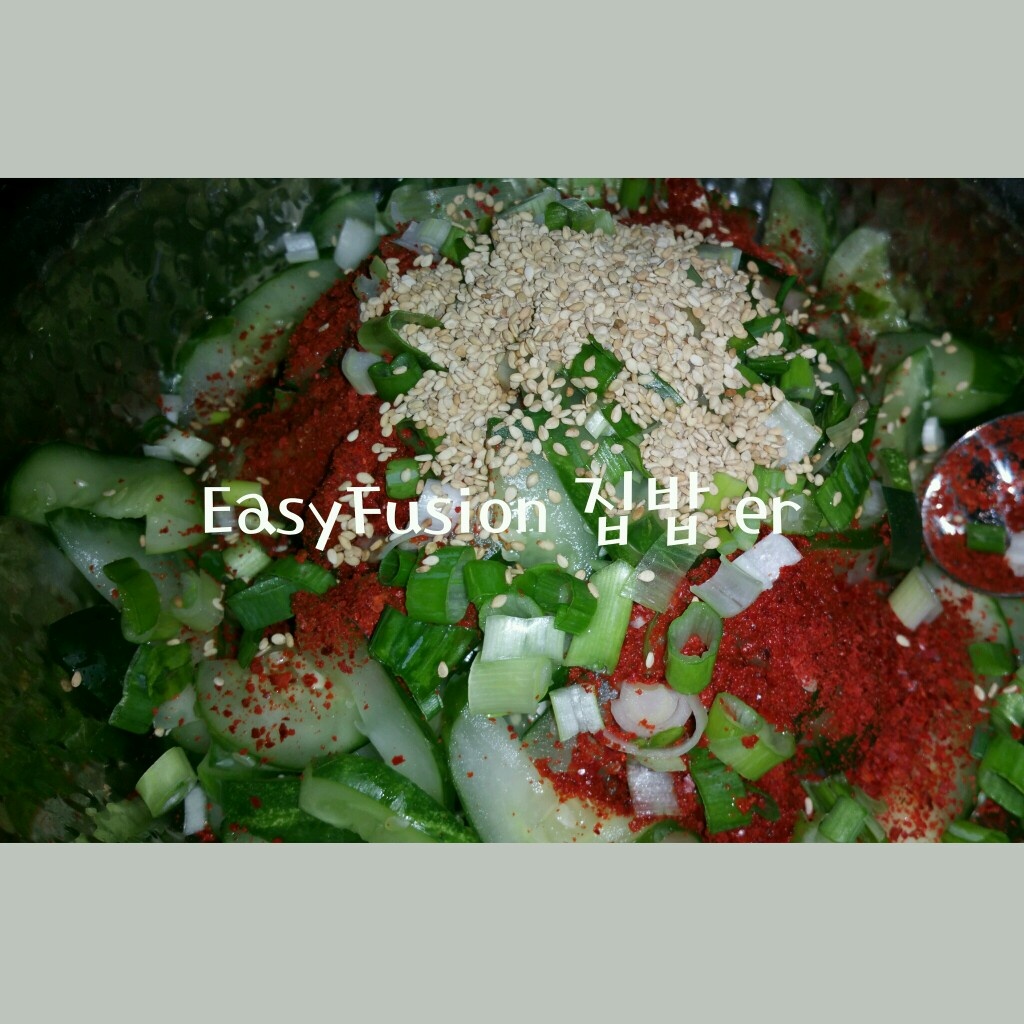 STEP 8/30[Seasoned cucumber] It's not that dark, right? The vegetables in bibimbap should not be seasoned too much like side dishes. It's to preserve the scent and taste of each herb, right?
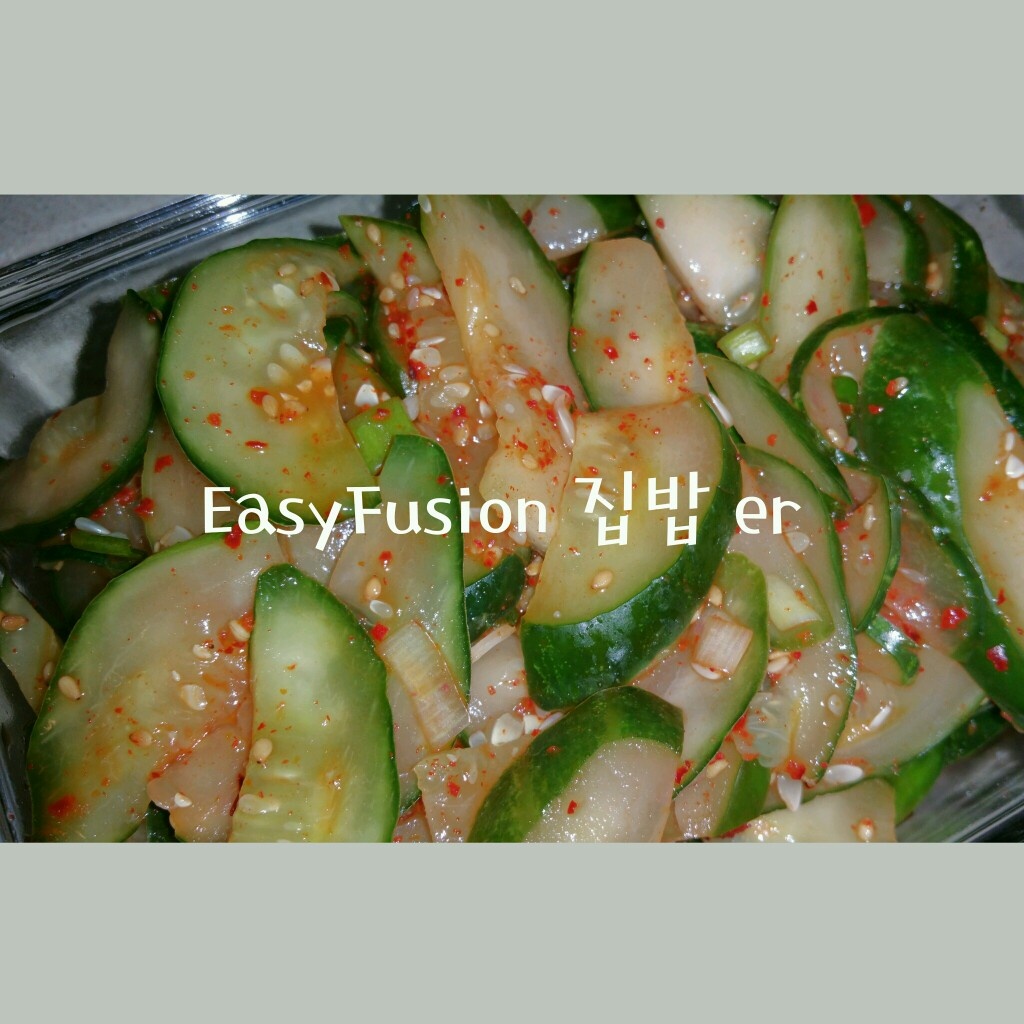 STEP 9/30If you want to use a chopping knife, use a chopping knife. If you want to use a chopping knife, use a chopping knife. I like the texture of cutting with a knife, so it took some time, but I cut it with a knife. It can't be too thick, but even if it's too thin, the texture dies. I don't think it's bad if it's about 0.3 to 0.5cm thick.
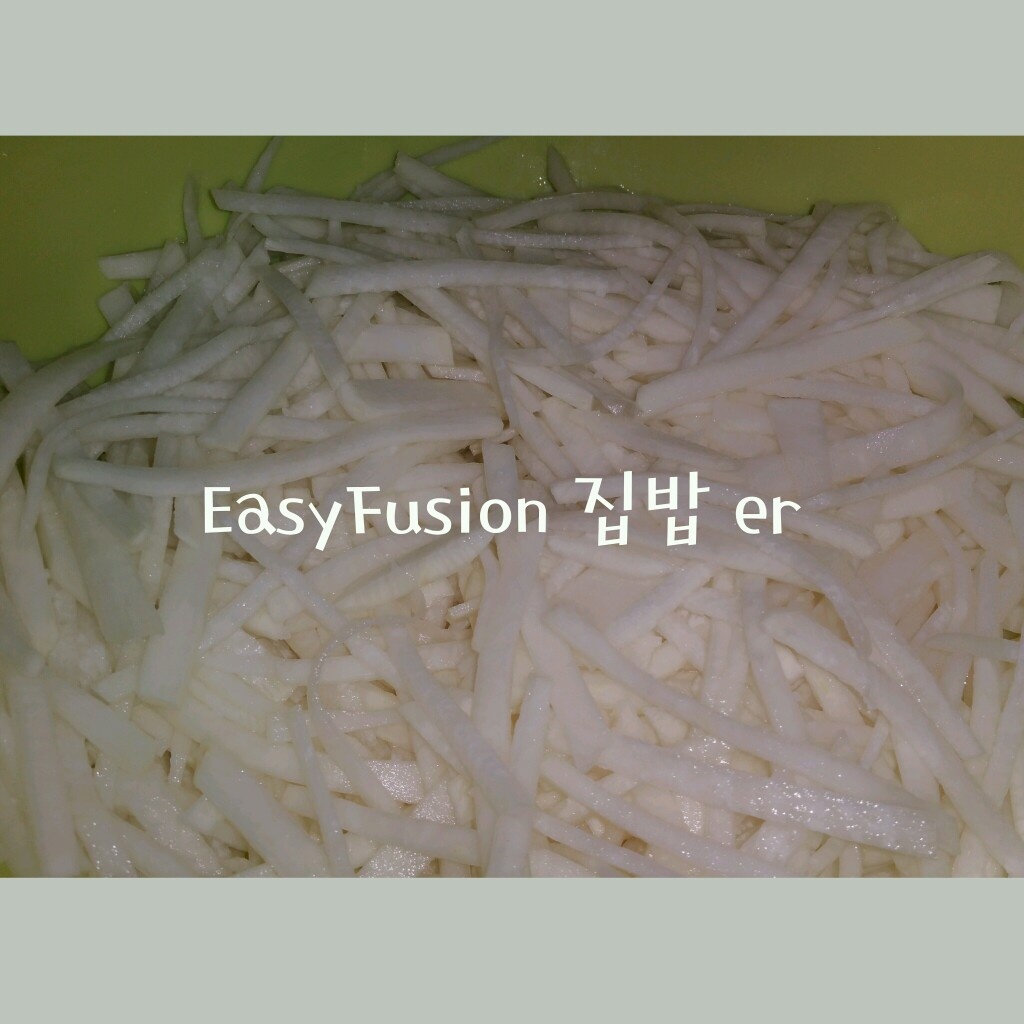 STEP 10/30[Muksaengchae] It's a vegetable with a lot of water like radish cucumbers, so if it's not pickled, the water comes out well, but if you squeeze it too much, the delicious water will all fall out, so the vegetables won't taste good. Sprinkle with thick salt like cucumbers and soak it for about an hour, wash it in water, squeeze it, and try it. The unique spicy taste of radish has disappeared a little, but the scent is just right.
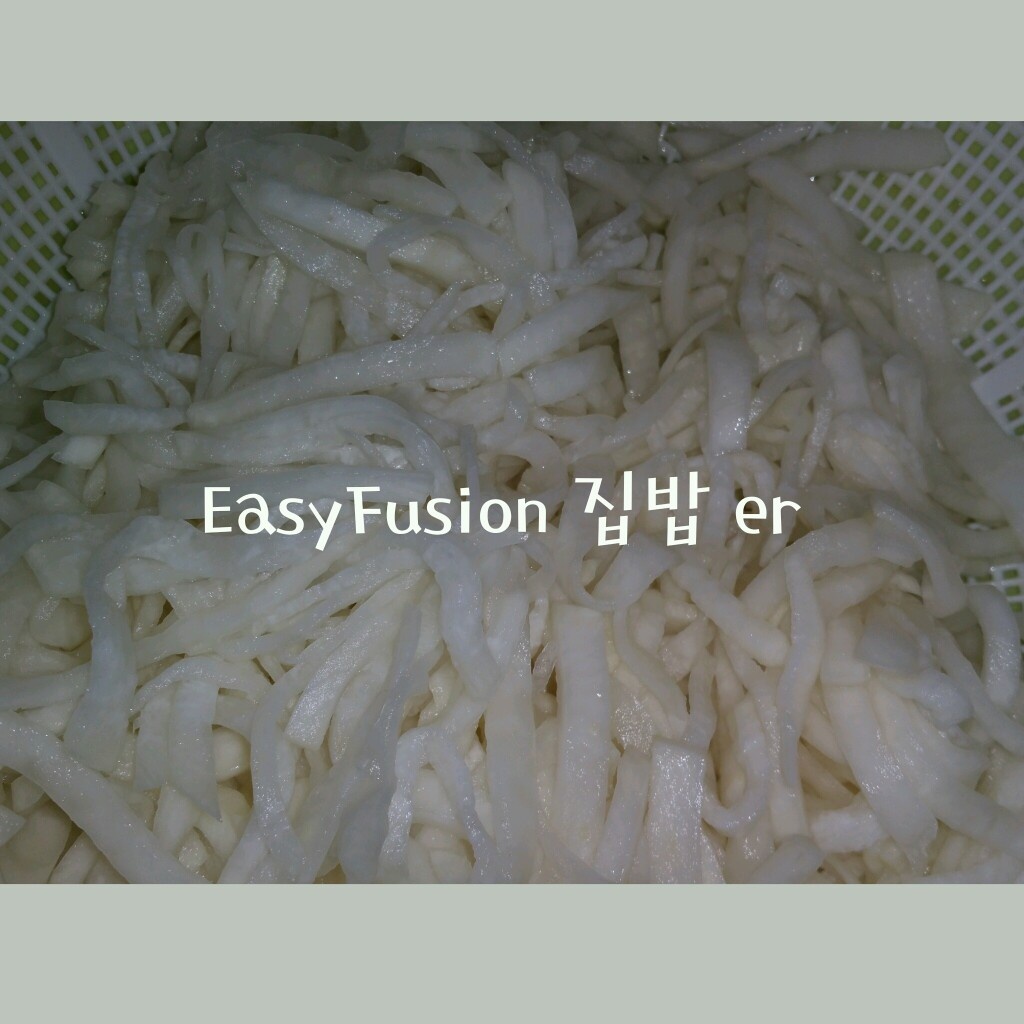 STEP 11/30[Sliced radish] The radish I bought was so bitter and bad... I skipped ground garlic. I put in more sugar than I thought, but it didn't taste bitter. Add 1t of ground garlic, 2T of red pepper powder, 2T of sesame salt (or stir-fried sesame) 2T, 5T of vinegar, 1T of plum syrup, 3T of sugar, 1T of anchovy sauce (or salted shrimp), 5T of chopped green onion and mix. There's also seasoned cucumber, so we can take out the sour taste You can skip it if you want. When you eat radish salad as a side dish, vinegar is needed to make it delicious, but sometimes you don't put it in when you mix it.
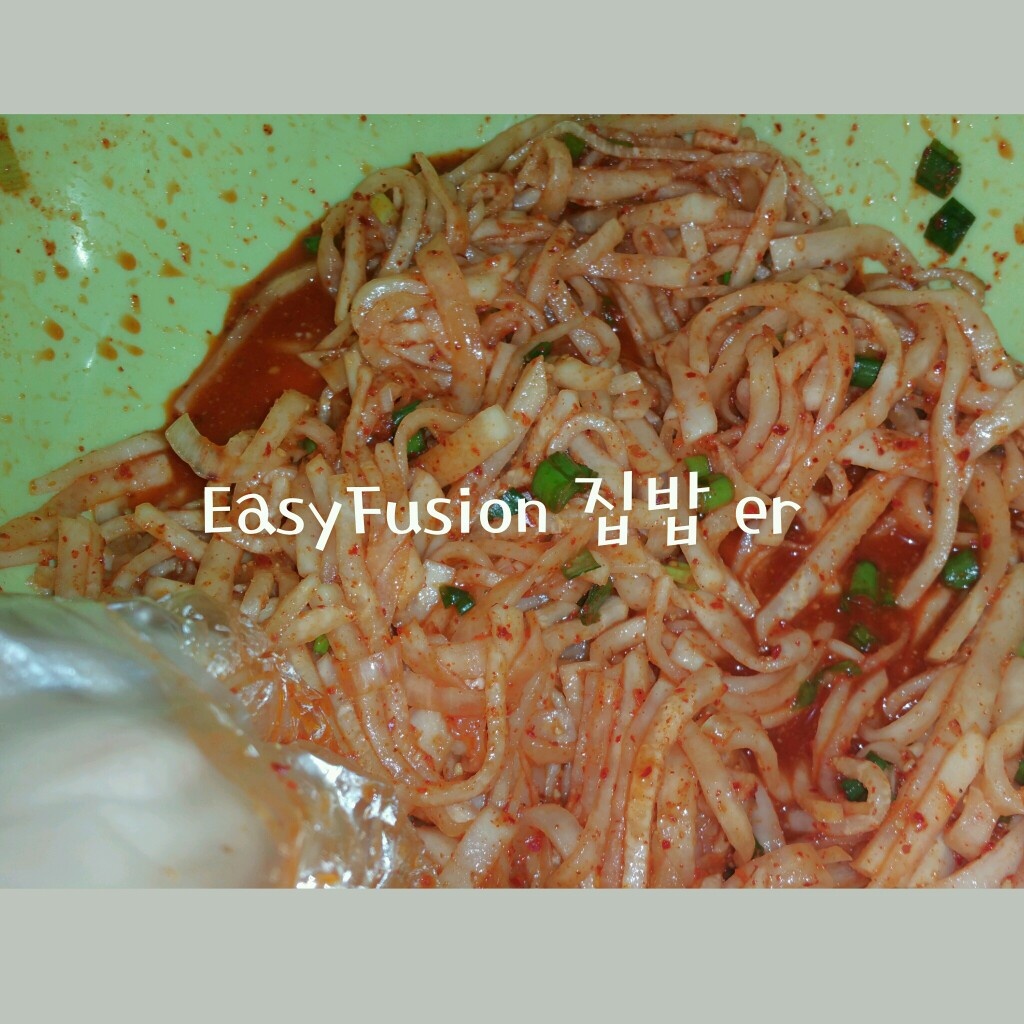 STEP 12/30[Salted radish] Isn't it pretty when the color is soft?
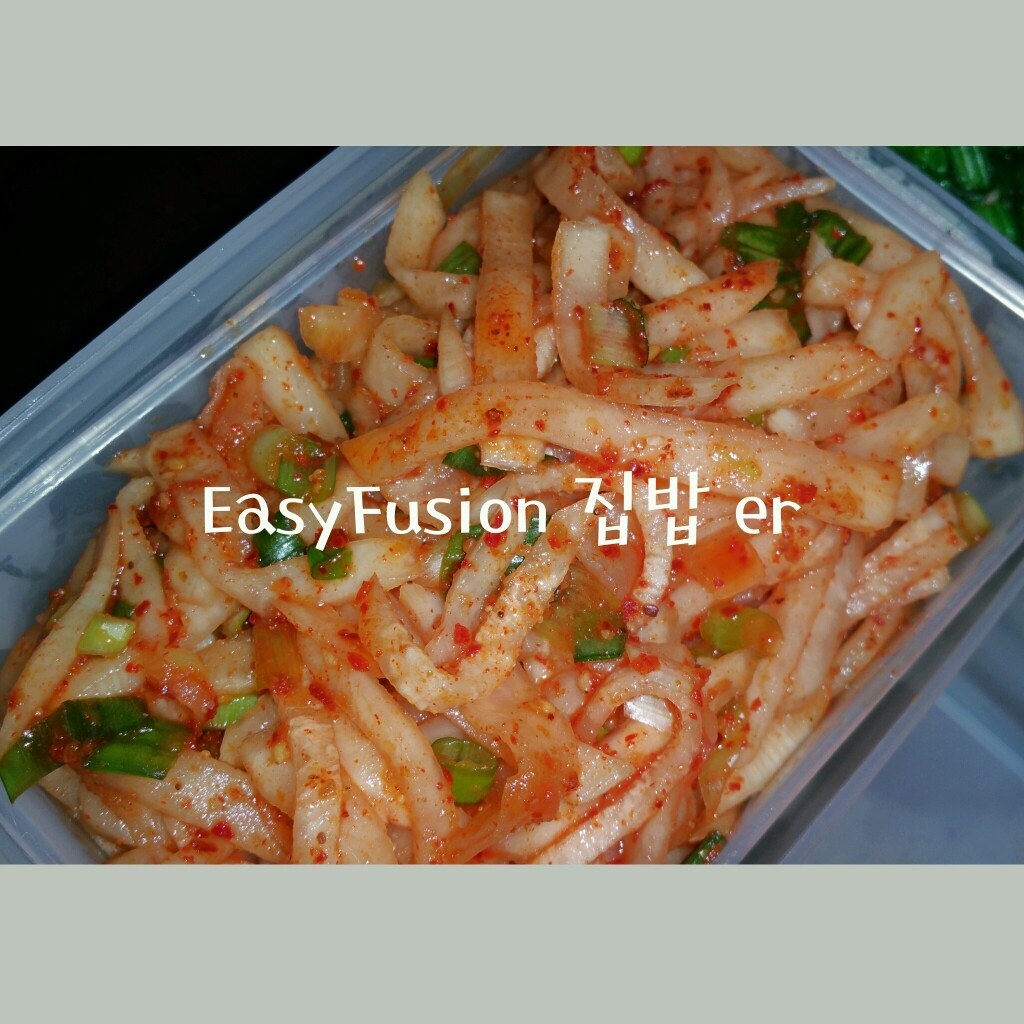 STEP 13/30[Stir-fried zucchini] I should have a small chubby Joseon pumpkin that I use to fry zucchini pancakes, but I didn't have it, so I bought a common gray pumpkin here instead. Of course, it tasted worse than Joseon pumpkins, and even though I bought five because it was small and thick, it was only about two or three of them, and I couldn't cut them pretty and evenly. Cut it into 0.5-0.7cm thick pieces and soak it with salt as if it is seasoned. It was fine salt, but it was sea salt. Don't use salt. If you don't have it, just sprinkle a small amount of salt...
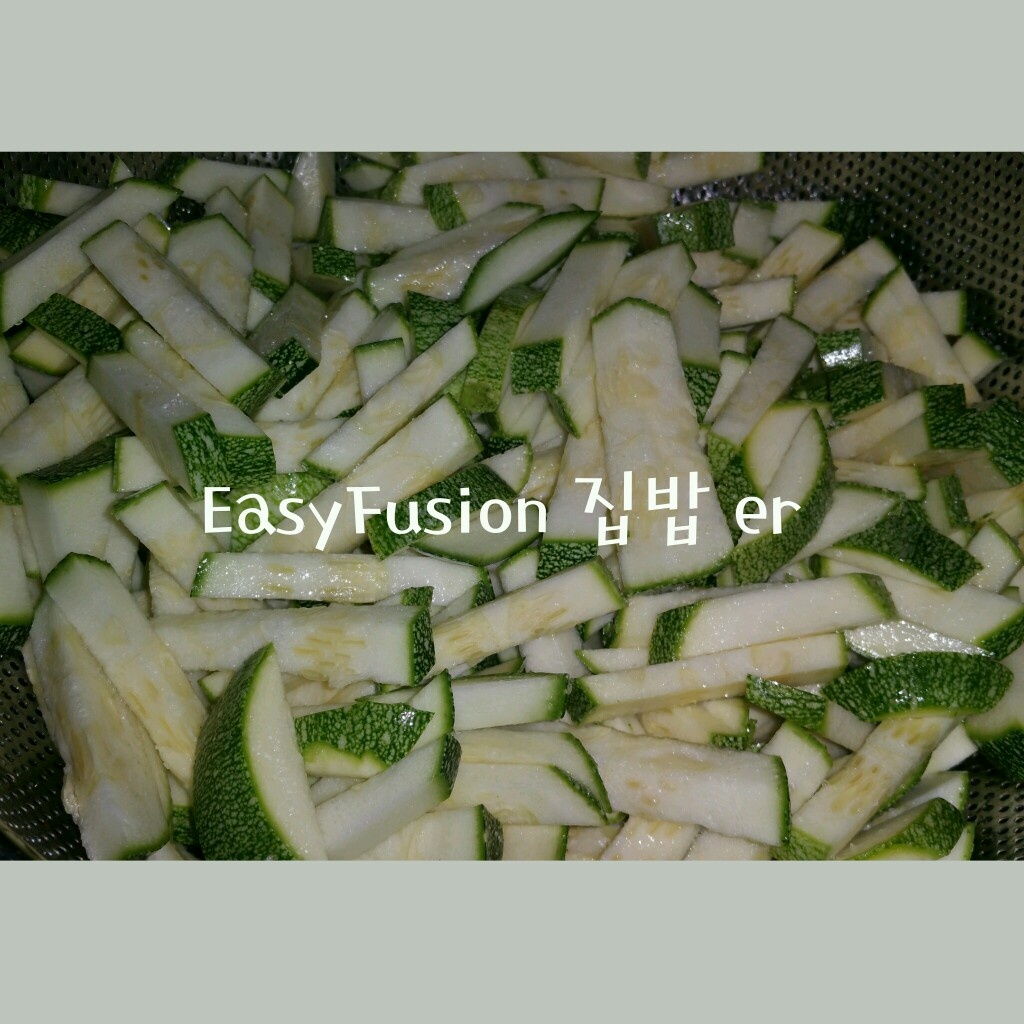 STEP 14/30[Stir-fried pumpkin] I marinated it for 30 minutes to an hour. I didn't sprinkle a lot of thin salt, so I squeezed it right away without washing it, but if you used a lot of salt to pickle it quickly, make sure to wash it before you squeeze it.
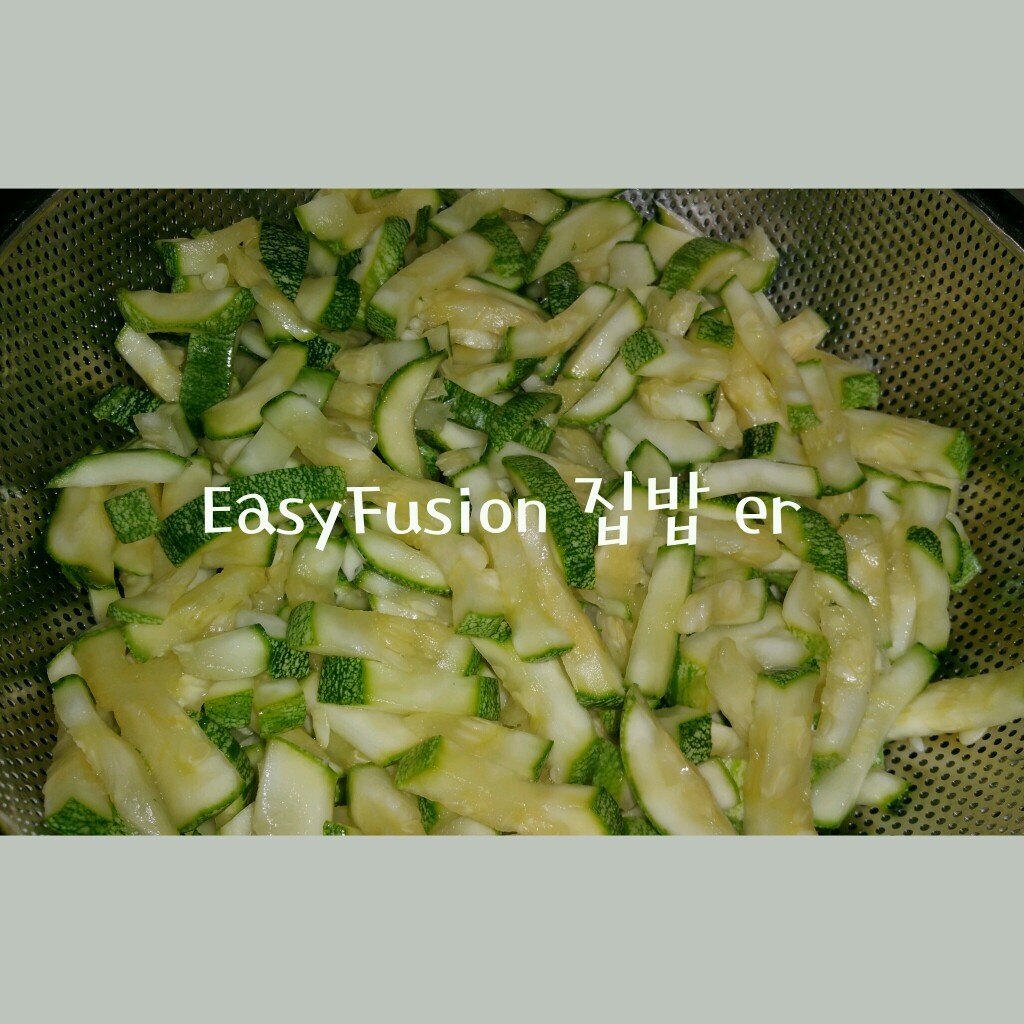 STEP 15/30[Stir-fried pumpkin] Chop 1T salted shrimp with a knife.
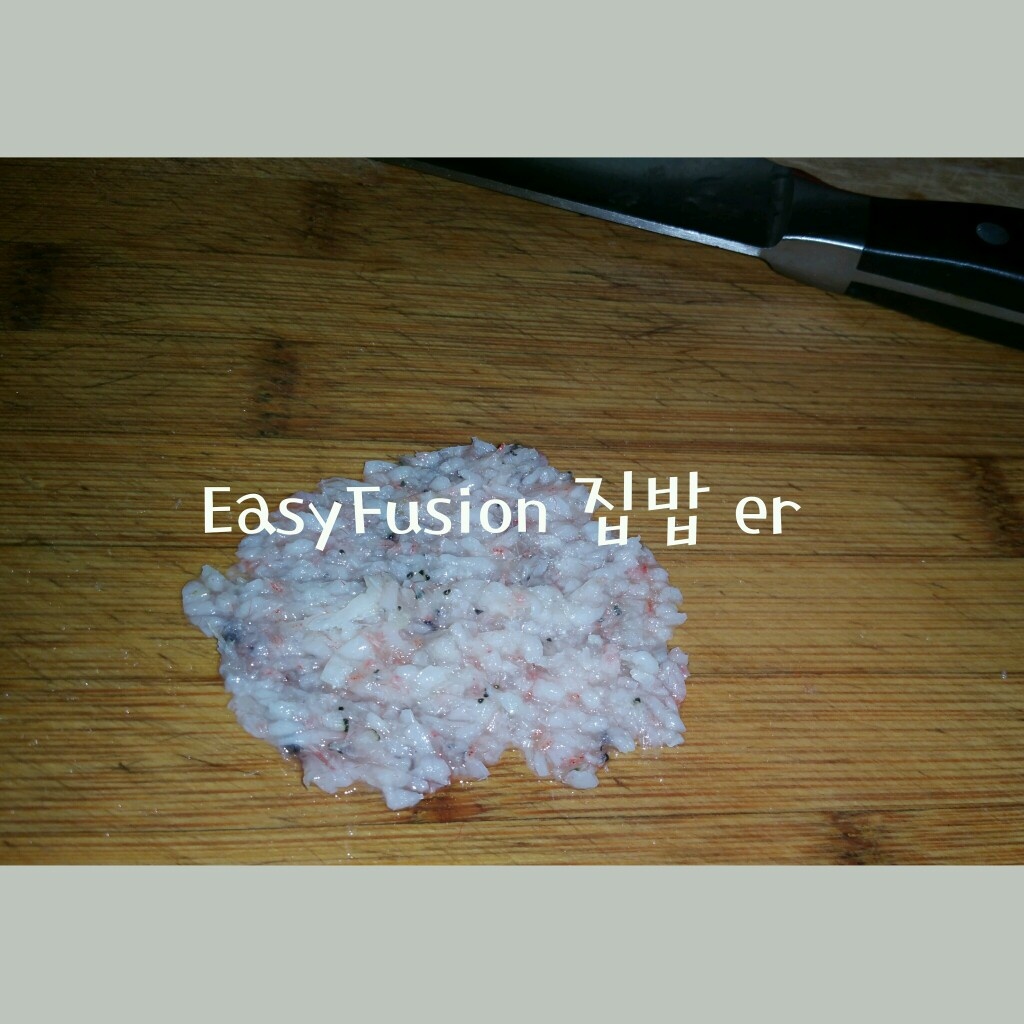 STEP 16/30[Stir-fried pumpkin] Stir-fry 1T of sesame oil, salted pumpkin, chopped shrimp, and 1t of ground garlic in a pan.
 STEP 17/30[Stir-fried pumpkin] If you soak it, squeeze out the water, and stir-fry it, the water comes out less and the texture is firm. When done, turn off the heat and mix with 2T of sesame salt or stir-fried sesame seeds.
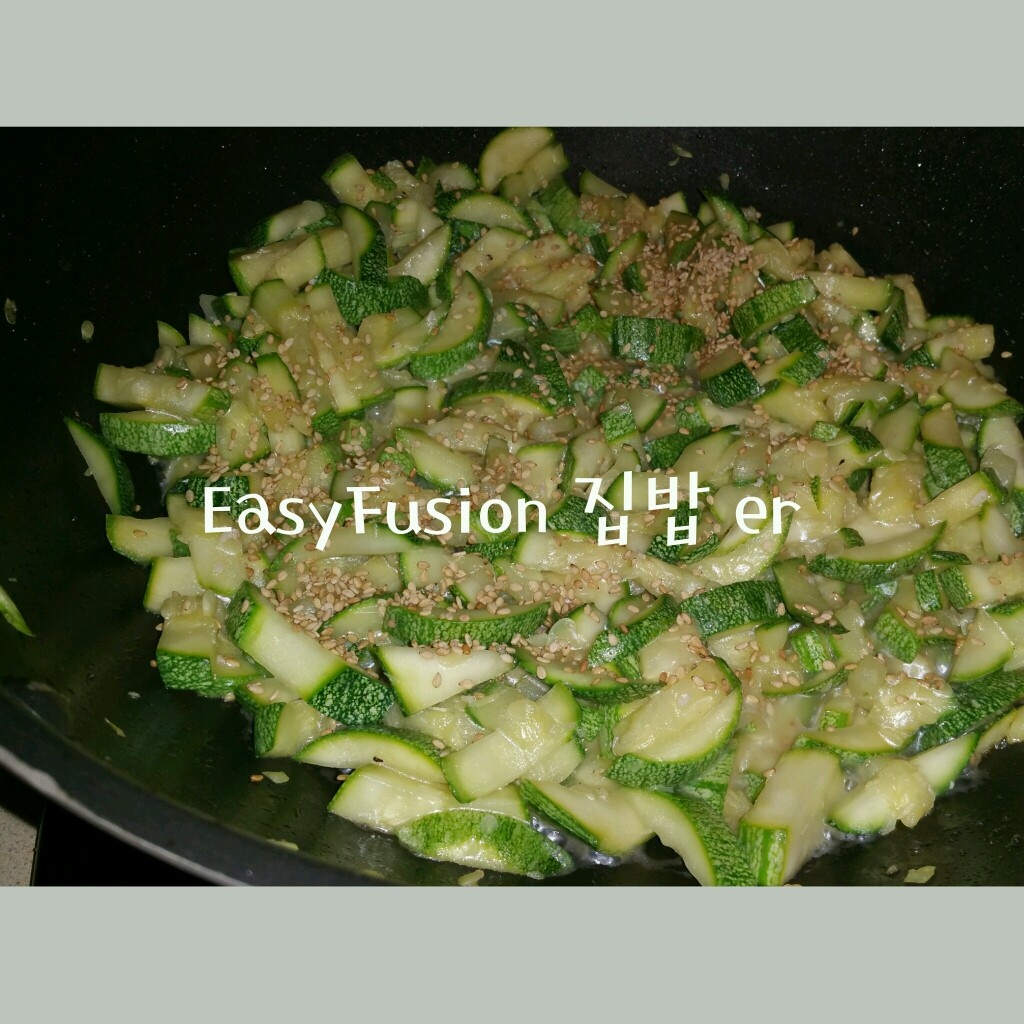 STEP 18/30[Seasoned spinach] Boil a spoon or two of thick salt in the water.
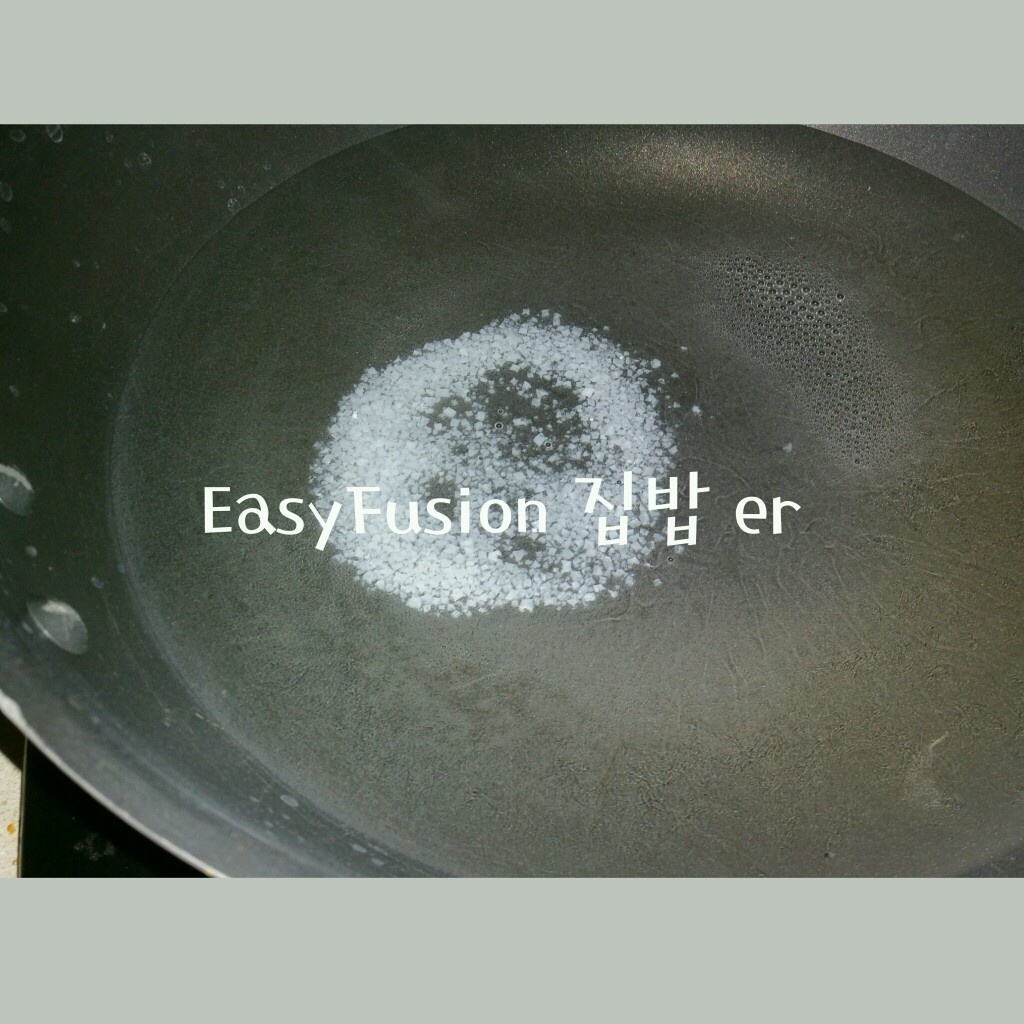 STEP 19/30[Seasoned spinach] When the water boils, add the washed spinach
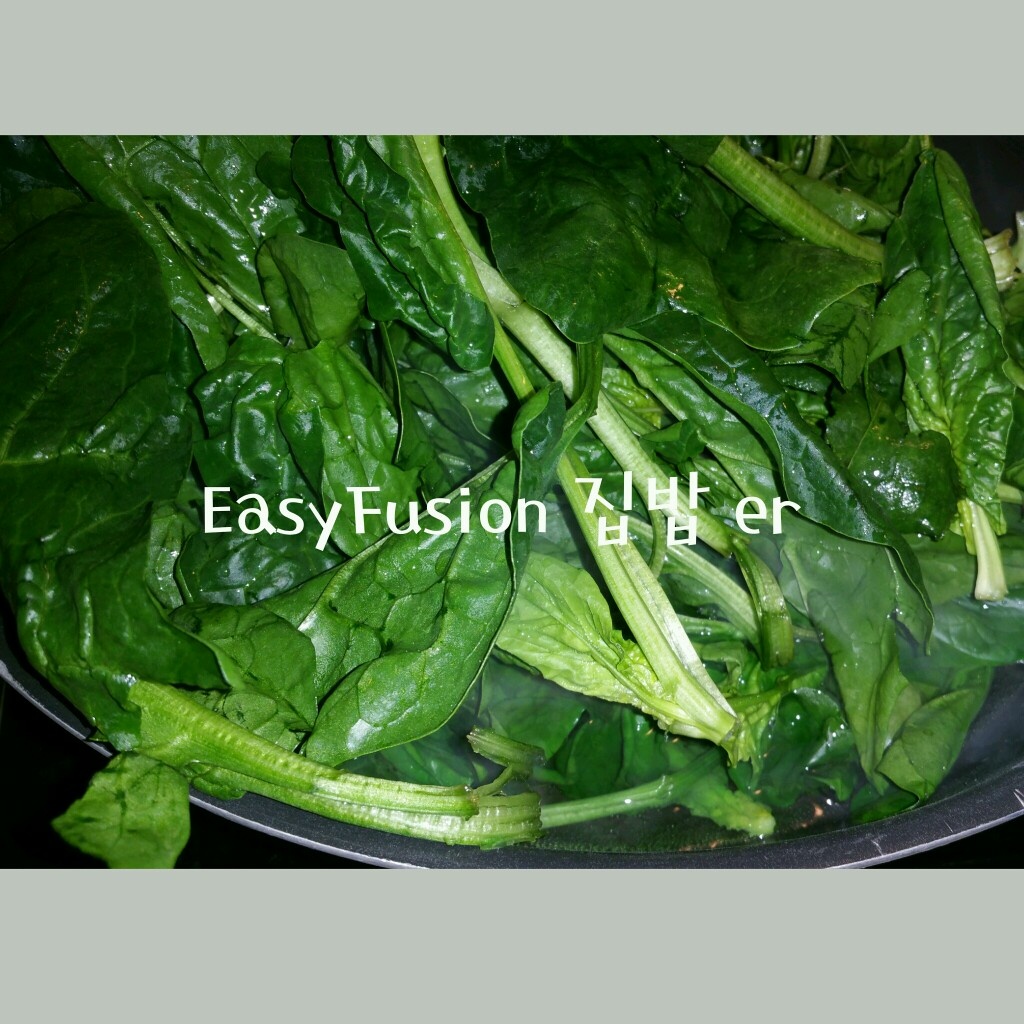 STEP 20/30[Seasoned spinach] After counting 3 seconds, turn it over using tongs or chopsticks.
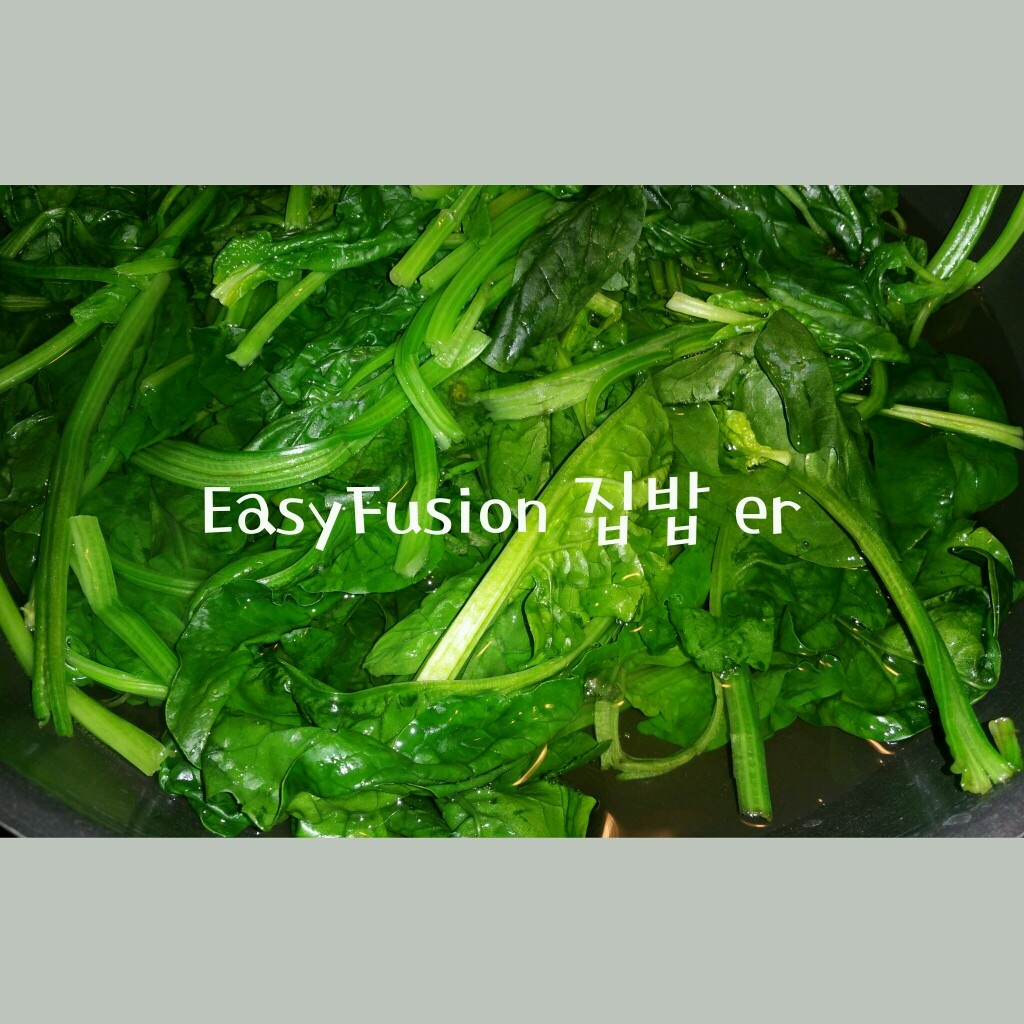 STEP 21/30Turn off the heat as soon as you turn it over and take a cold shower.
 STEP 22/30[Seasoned spinach] Squeeze the spinach thoroughly in cold water and cut it with a knife to make it easy to eat. It overflowed from the wok before blanching, but after squeezing it out, it's only two handfuls big.
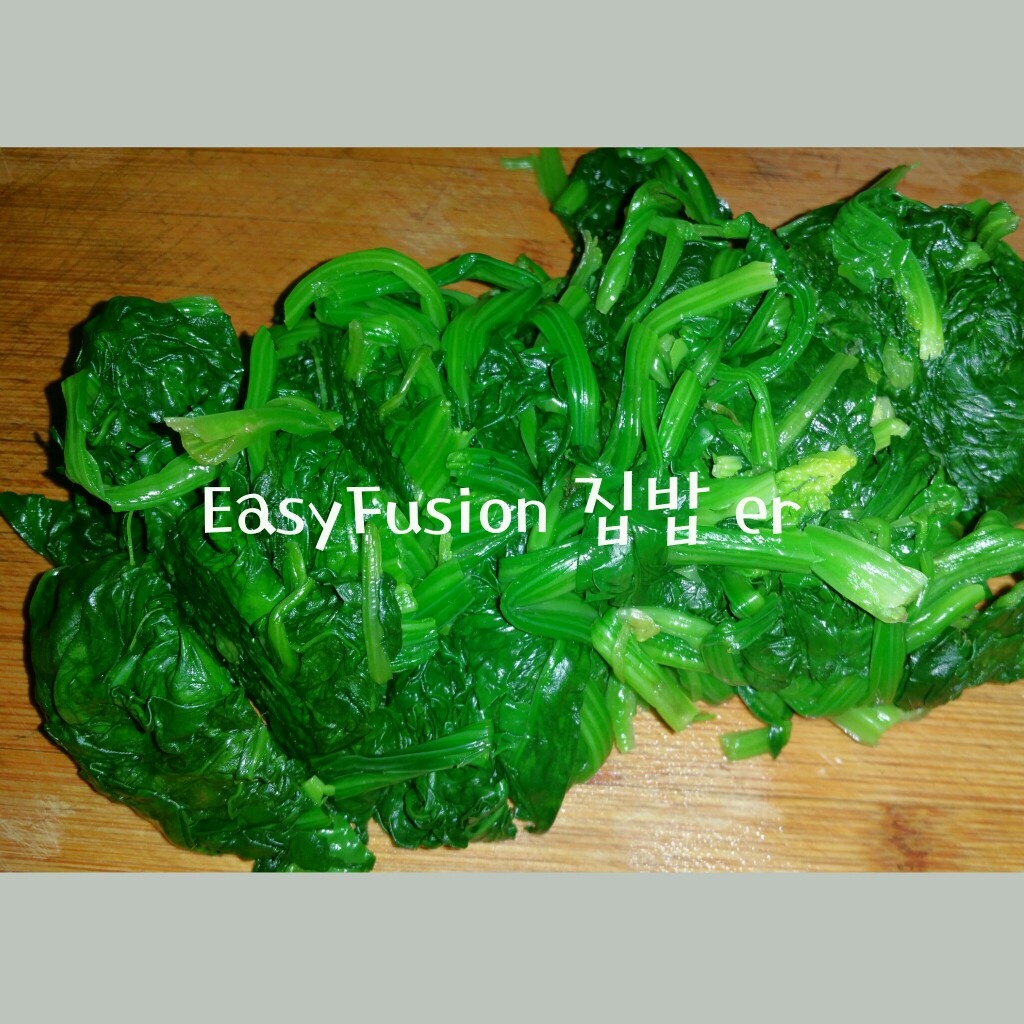 STEP 23/30Transfer the tightly squeezed spinach to a bowl and gently scatter it so that it falls apart without sticking to your hands with sanitary gloves.
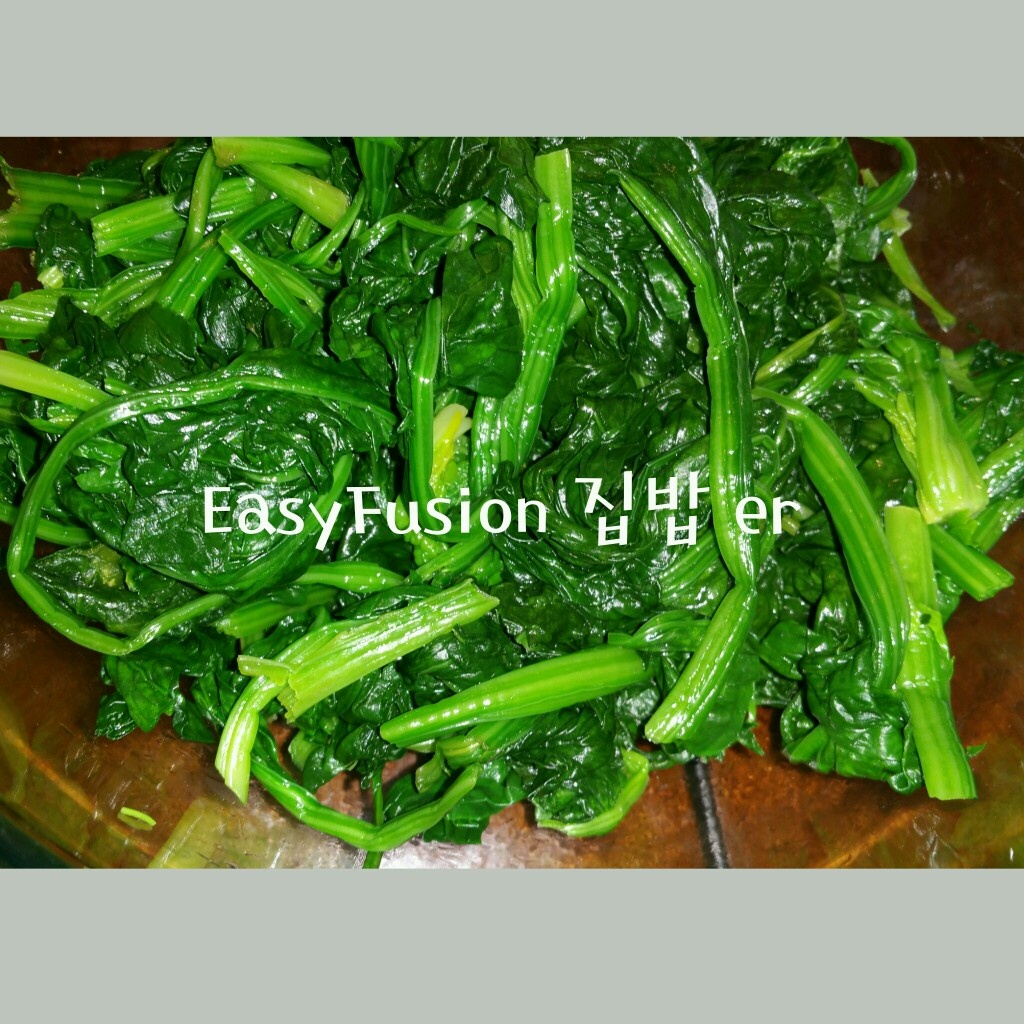 STEP 24/30[Seasoned spinach] Add 1/4t of salt, 1t of sesame salt (or stir-fried sesame seeds), 1t of ground garlic, 1t of sesame oil, and gently shake it with your fingers and season it carefully.
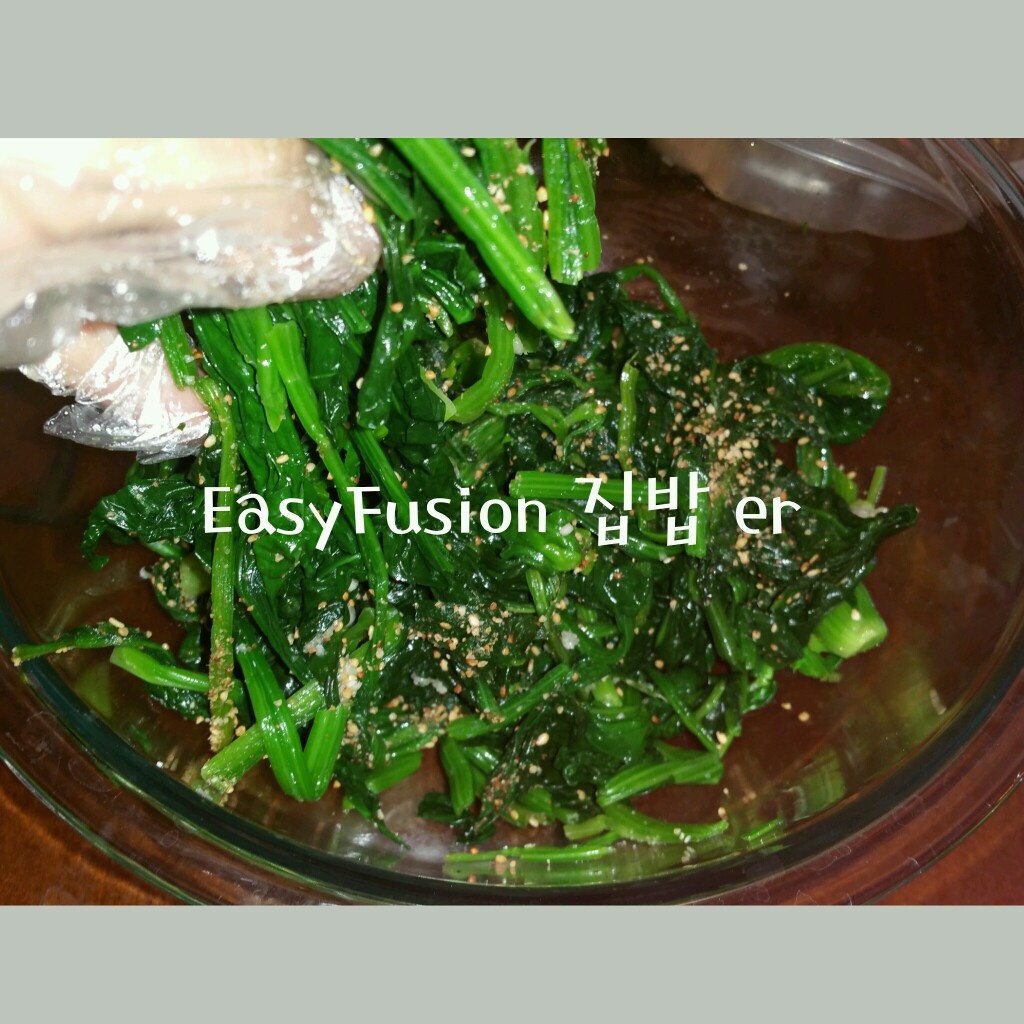 STEP 25/30[Spinach greens] You can't press it down when you put it in a bowl.
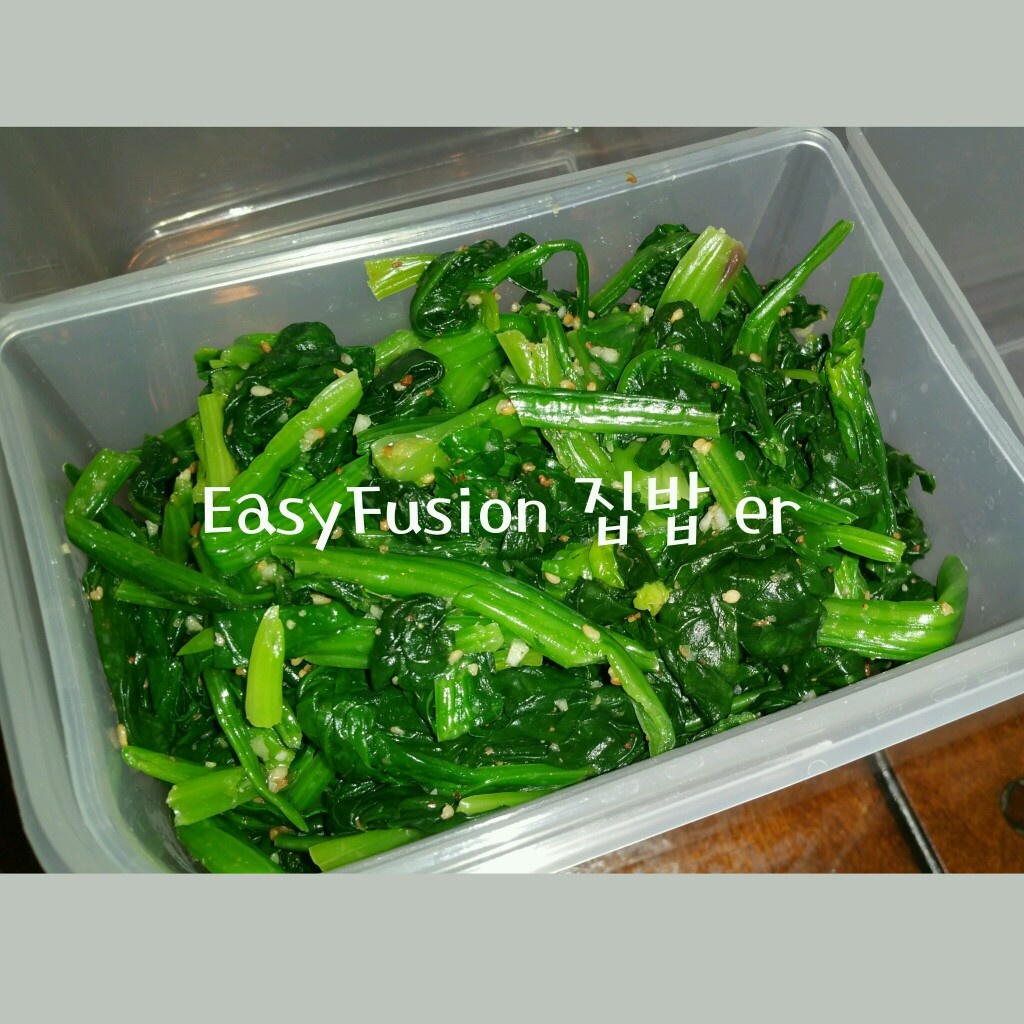 STEP 26/30[Bean sprouts] I use the method of blanching bean sprouts and stir-frying them without seasoning. It's not a traditional method, but it's a waste to drain the delicious water. The recipe overlaps, so I'll hang it up as a link. [Stir-fried bean sprouts] @6865750
 STEP 27/30[Stir-fried carrot] Carrots are used to bring out the color, but they're also included in traditional Jeonju bibimbapYes. Shred it and fry it in an oiled pan with fine salt and pepper powder.
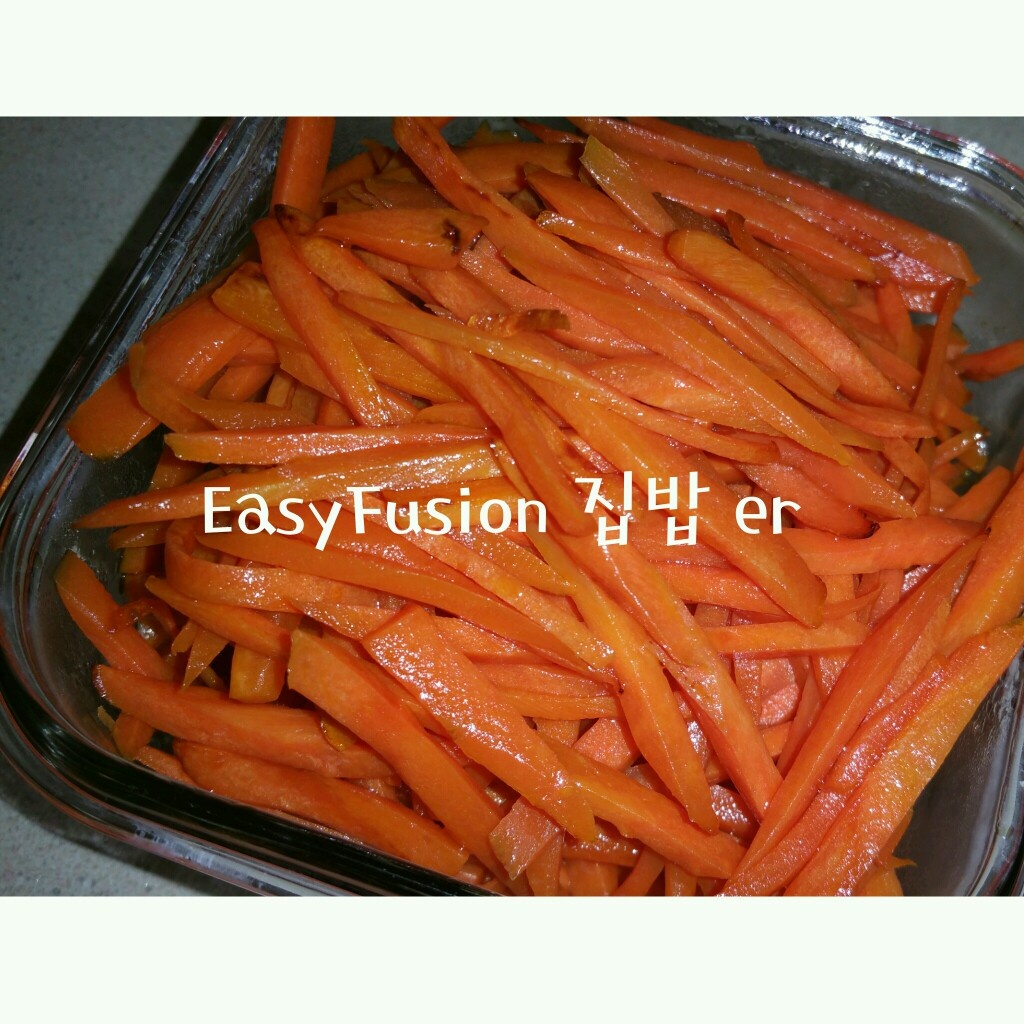 STEP 28/30First, I put rice in the middle of a flat bowl and put 1T of stir-fried red pepper paste on top. Like a restaurant, you can put vegetables and serve red pepper paste separately, but I just did it like this. Many people think that stone pot bibimbap is traditional Jeonju bibimbap, but it's not.
 STEP 29/30[Putting in bibimbap] Put in a proper amount of vegetables so that each color stands out.
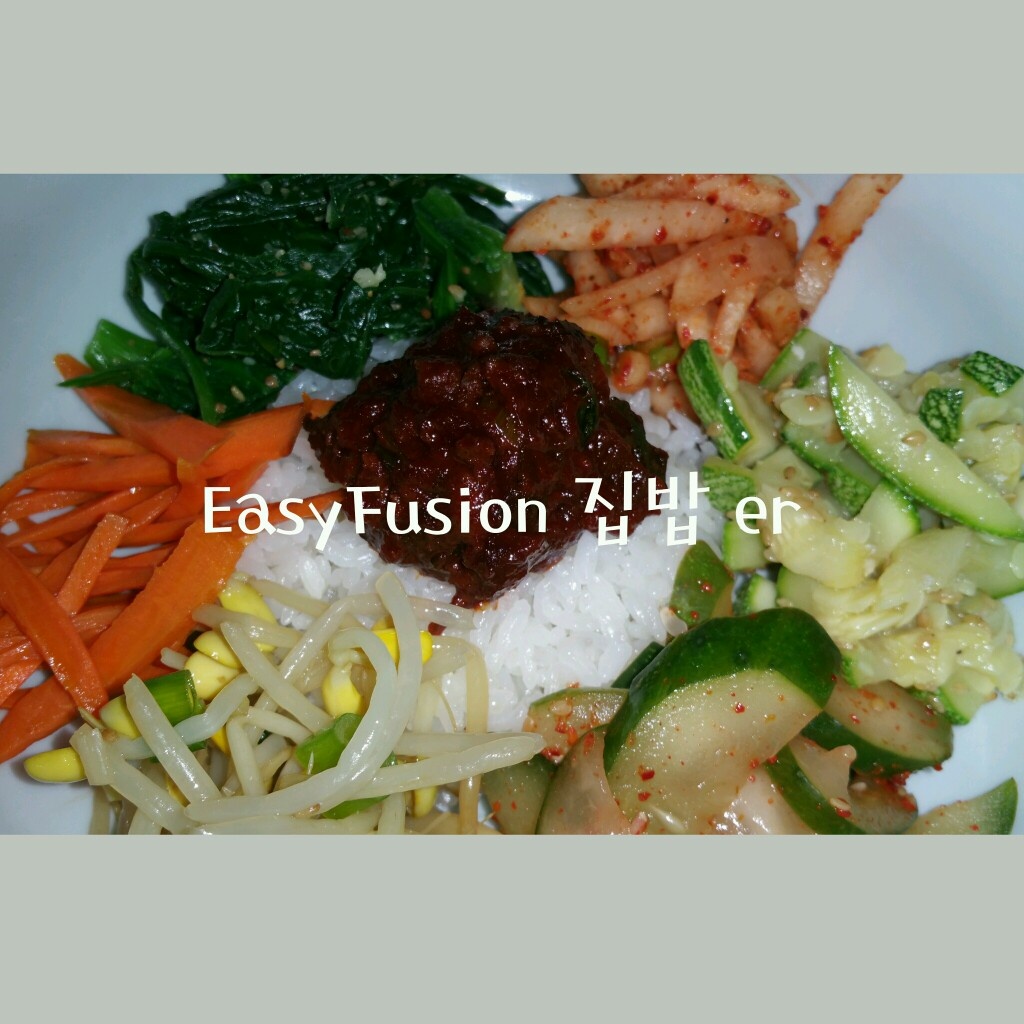 STEP 30/30[Putting the bibimbap] Lastly, you can put the fried egg on top. Traditional Jeonju Bibimbap is supposed to be served with bean sprout soup, which was boiled with a simple recipe because my mom's birthday was just around the corner. Bored soup goes well with bibimbap, so if you boil it with more water, it's good to eat it with bibimbap.
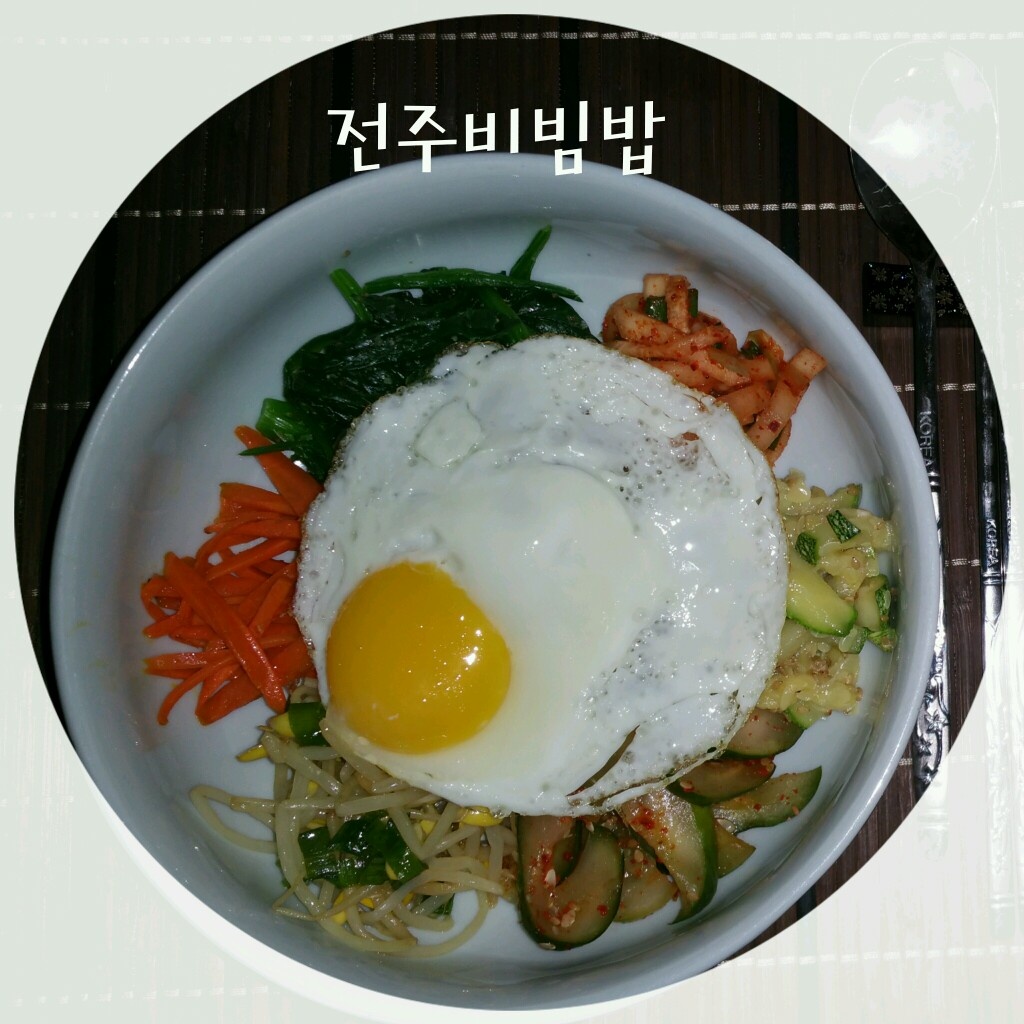 I think bibimbap is delicious when you put your heart into every vegetable. Making it is cumbersome and takes time, but I was grateful and happy to think that it was a side dish that my mom made for me.
- Cooking review
-
5.00score
-

 760*****scoreIt was the best bibimbap in my life2021-05-30 16:53
 -
 994*****scoreI made it well Thank you2020-05-14 20:27
 -
 769*****scoreThank you2020-01-04 22:28
-
- stir-fried Rice Cake Recommended recipe
-
-
1
 As expected, Jongwon Baek's golden recipe! Use the leftover rice4.56(32)
 -
2
 Following Maritel Baek Ju-bu's oil tteokbokki,4.98(40)
 -
3
 Maritel Jongwon Baek oil tteokbokki4.76(29)
 -
4
 Making Rose Tteokbokki - Without whipped cream, deliciously~5.00(48)
-
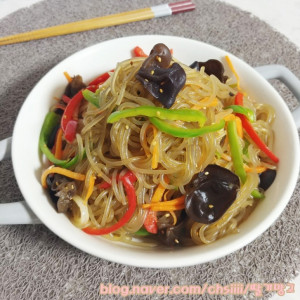
- Japchae Recommended recipe
-
-
1
 Making fish cake japchae with ingredients in the fridge4.86(77)
 -
2
 How to make japchae deliciously! It's too simple4.85(39)
 -
3
 One pan japchae that doesn't stir-fry the ingredients separately5.00(17)
 -
4
 Meatless japchae (paprika japchae with only vegetables)4.88(16)
-