#Making chives and chives kimchi #Chives and green onion kimchi
It's chives chives kimchi made with chives and chives. It's kimchi that goes well with crunchy and cool rice and noodles!!!
6 serving
Within 60 minutes
강철새잎
- Ingredients
-
-
Scallions1pack
-
leek1pack
-
Red pepper powder3cup
-
crushed garlic1/2cup
-
ginger powder1TS
-
salted anchovies1/2cup
-
salted shrimp1TS
-
plum extract2TS
-
a glue for kimchi glue1cup
-
Sugar1ts
-
- Cooking Steps
-
STEP 1/18Let's trim the chives. Do not wash a layer of chives first, trim them first, and then wash them.
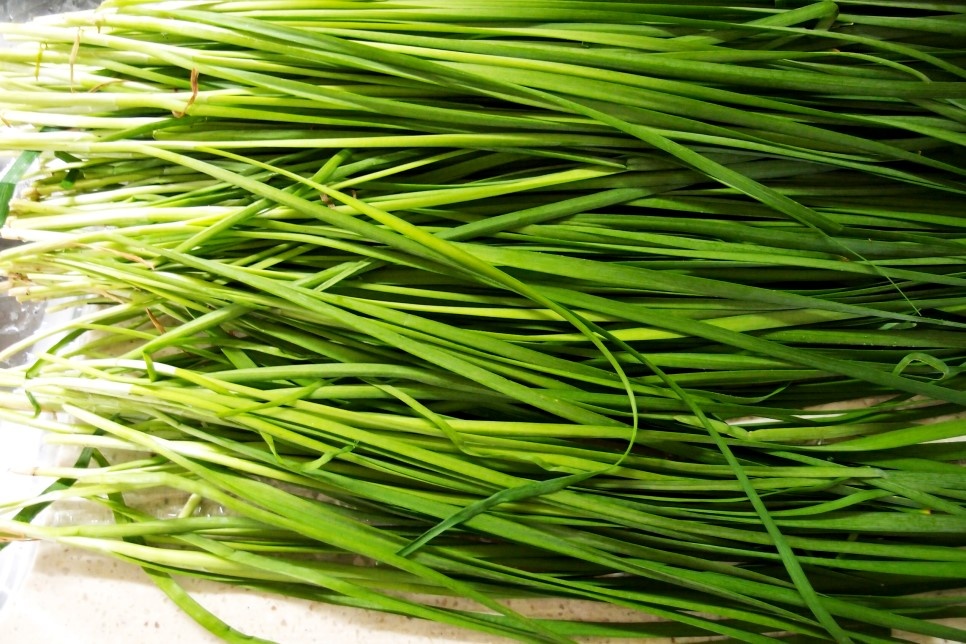 STEP 2/18Clean up the white part of the chives.
 STEP 3/18The bottom of the chives are also removed by tearing off the withered and tip by hand. If you do this, the chives are done. I have to trim each one, so it's a little hard and takes time, but it's best to trim it like this. Then wash it while shaking it in clean water.
 STEP 4/18Wash the chives and chopped chives and drain them. I bought the chopped green onions and just washed them. They sell chopped chives, but they don't have chopped chives~~~~ No matter how much you trim it, there is something to do, so you can trim the upper white root and the lower tail in the same way. In Mr. Baek's house-cooked meal, he salted the chives and chives, but I don't think it's necessary.
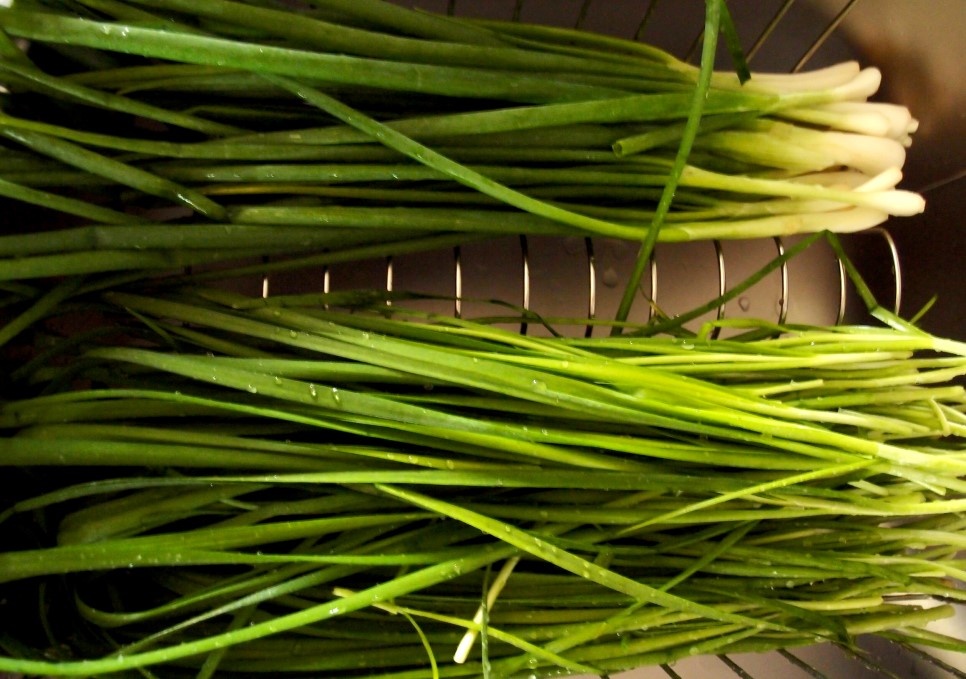 STEP 5/18Add flour and water and mix with flour paste. It's a flour paste that needs to be used in kimchi seasoning. Flour 1: I think the ratio of water 4 would be fine.
 STEP 6/18At first, you may think there is a lot of water, but when you boil it over low heat, the water decreases and becomes a thick grass. You can add more water while controlling the water.
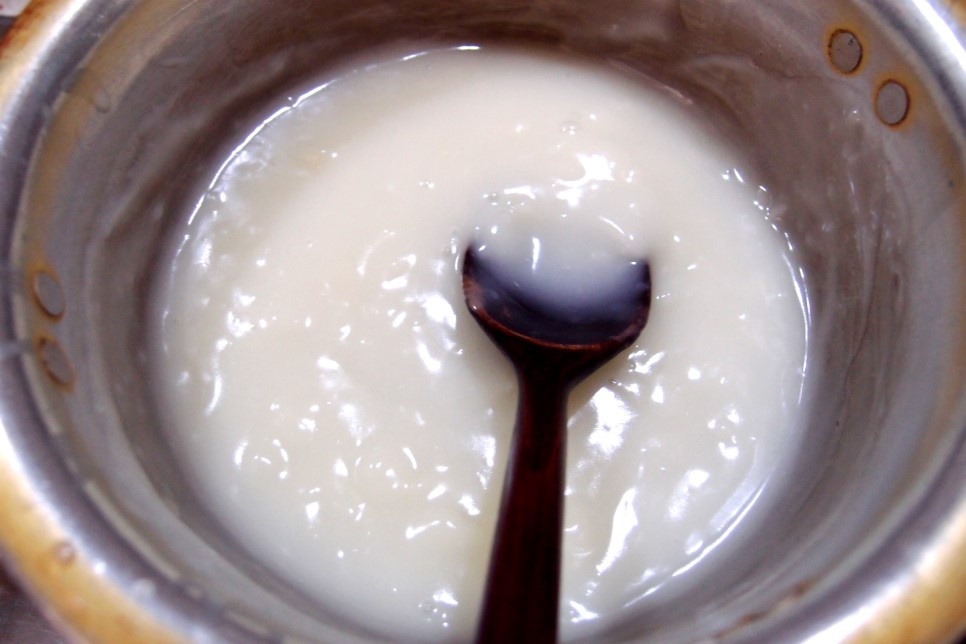 STEP 7/18Add red pepper powder and salted shrimp to the finished flour paste. Now I'm making the seasoning of chives and chives.
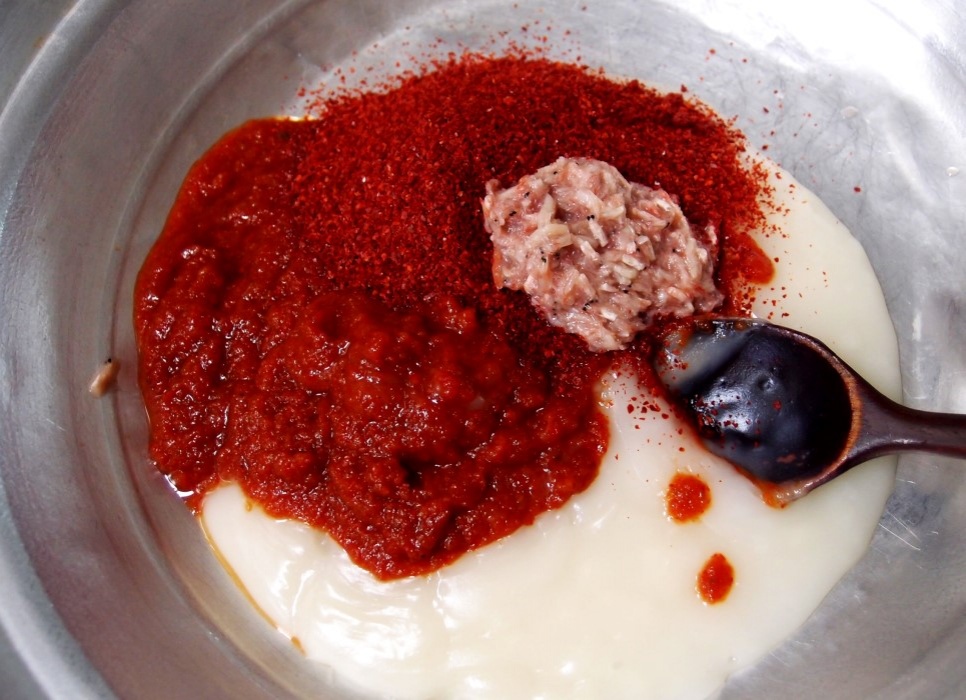 STEP 8/18Add minced garlic and sugar.
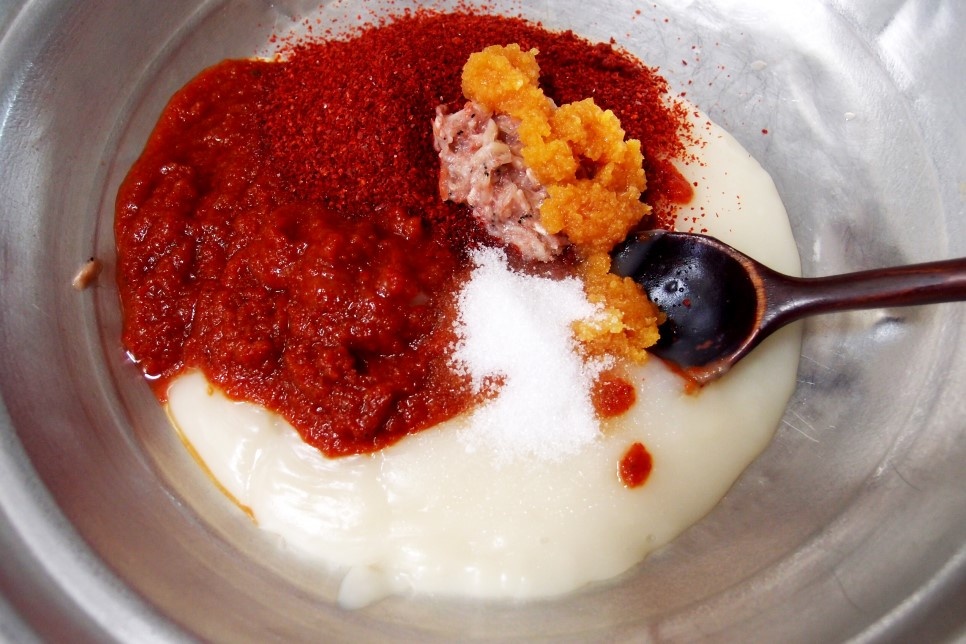 STEP 9/18Please add anchovy sauce and ginger powder. Add plum extract. It is plum juice that brings out the rich taste of kimchi.
 STEP 10/18I didn't add chopped green onions. Because it's chives kimchi and chives kimchi, so you don't have to add green onions. Mix it well. Then the seasoning is done.
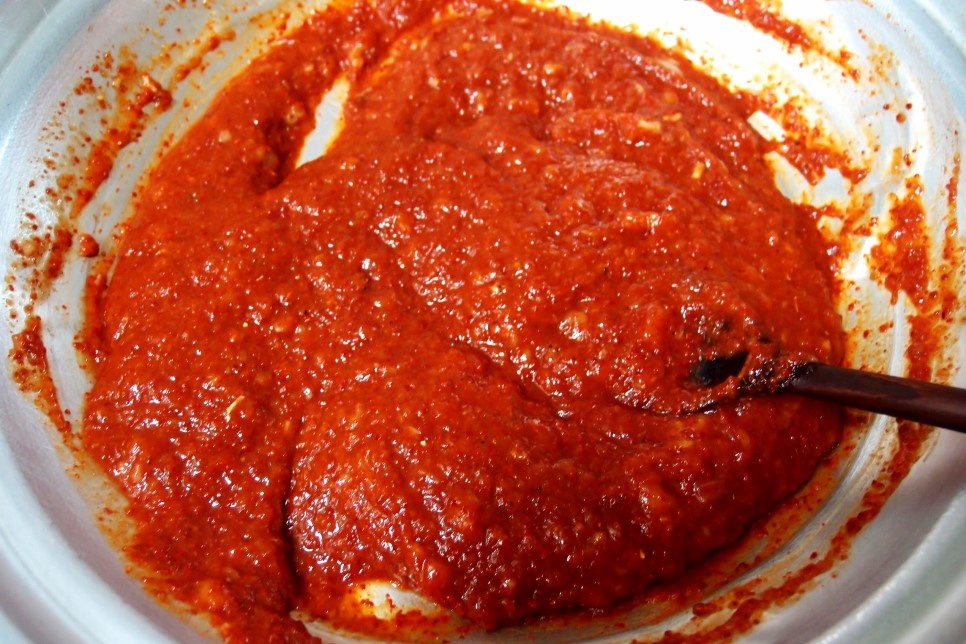 STEP 11/18Cut chives into finger-sized pieces and add seasoning. Adjust the concentration by adding the seasoning little by little. And there is seasoning in the chives kimchi, so it would be a disaster if you put it all in.
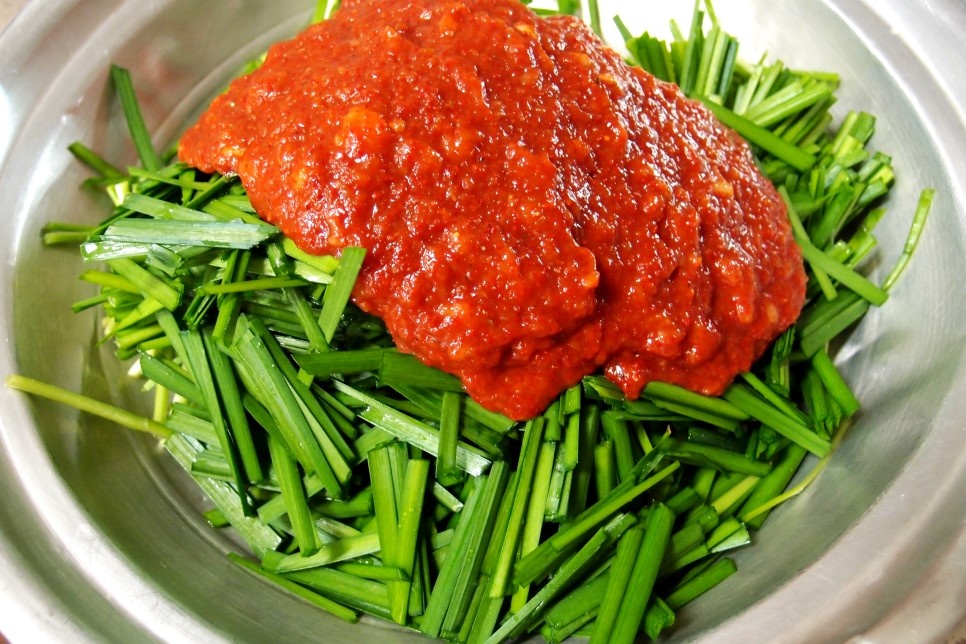 STEP 12/18Please mix it a little bit. If you mix it too quickly, the chives may smell green, so gently stir it with your two hands. First, the chives kimchi is done.
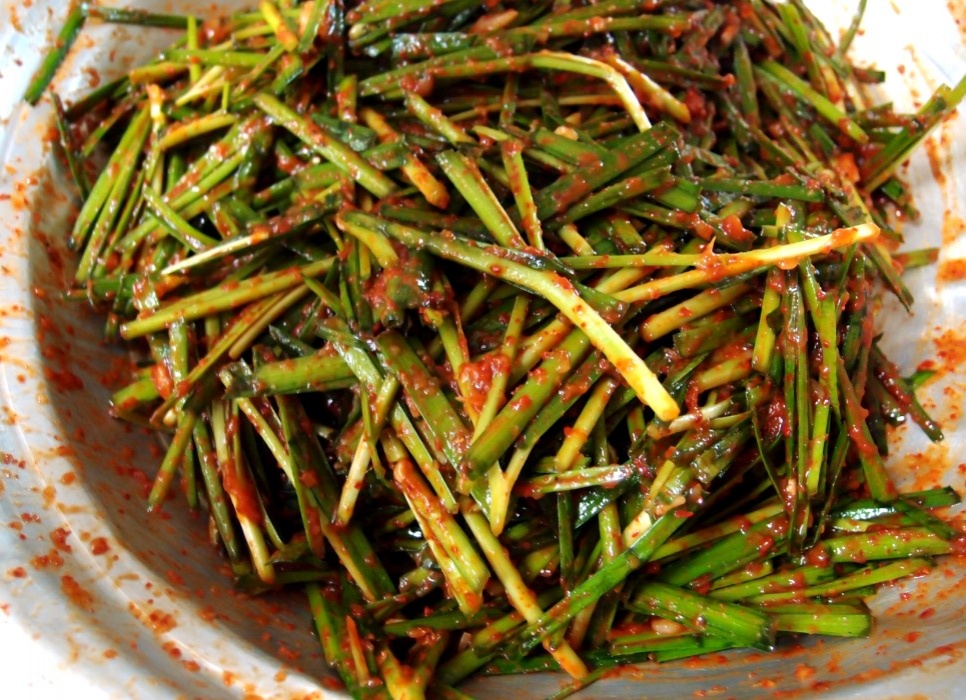 STEP 13/18I think we need to wrap up the chives kimchi. First, put the seasoning on the green onion kimchi and put it on the side of the green onion. Since this part might not be seasoned well, it's best to dry the white part first. After that, apply it on the ends with the remaining seasoning. Just apply it on the ends so that the sauce can seep in well.
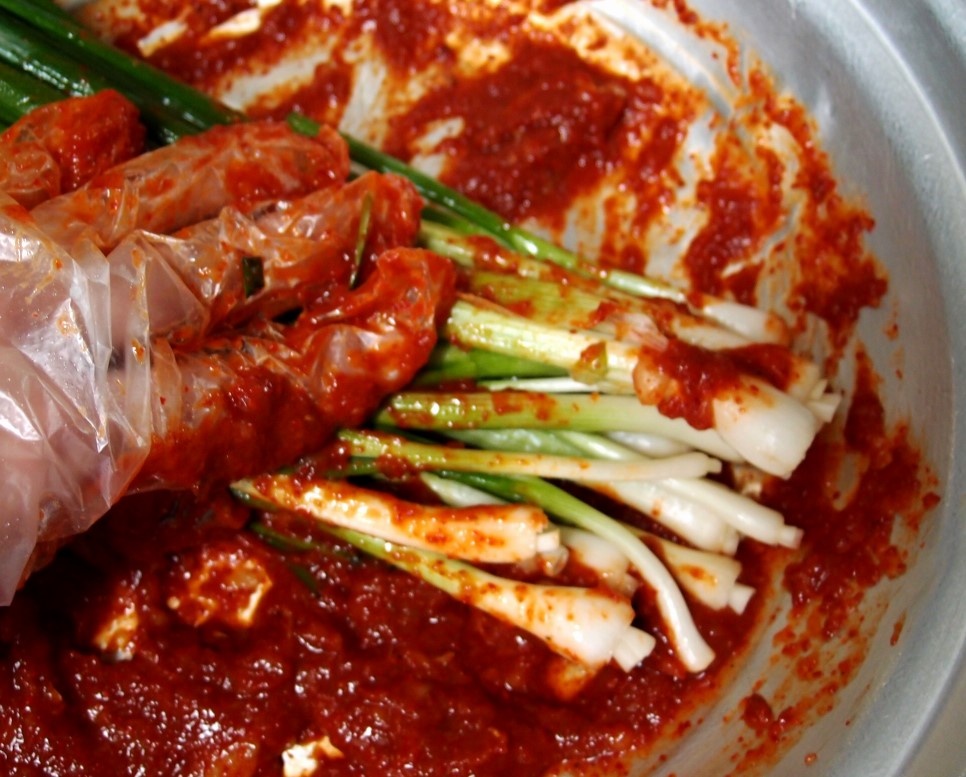 STEP 14/18Put the finished chives on the bottom of the kimchi container first.
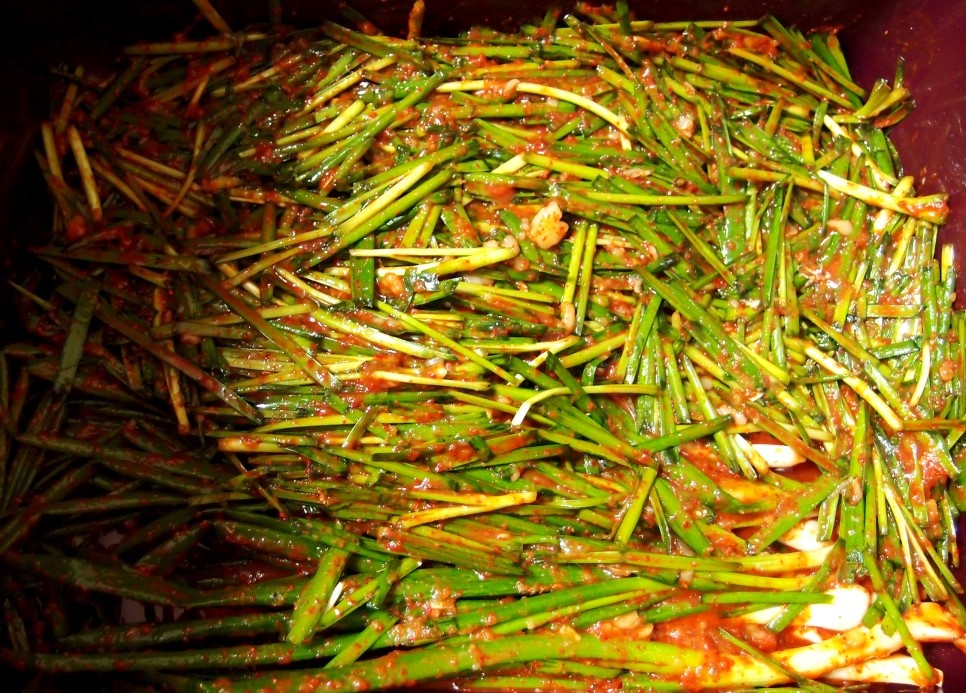
 STEP 15/18Put the finished chives kimchi on top and press it down. It's because the seasoning permeates well without an air layer.
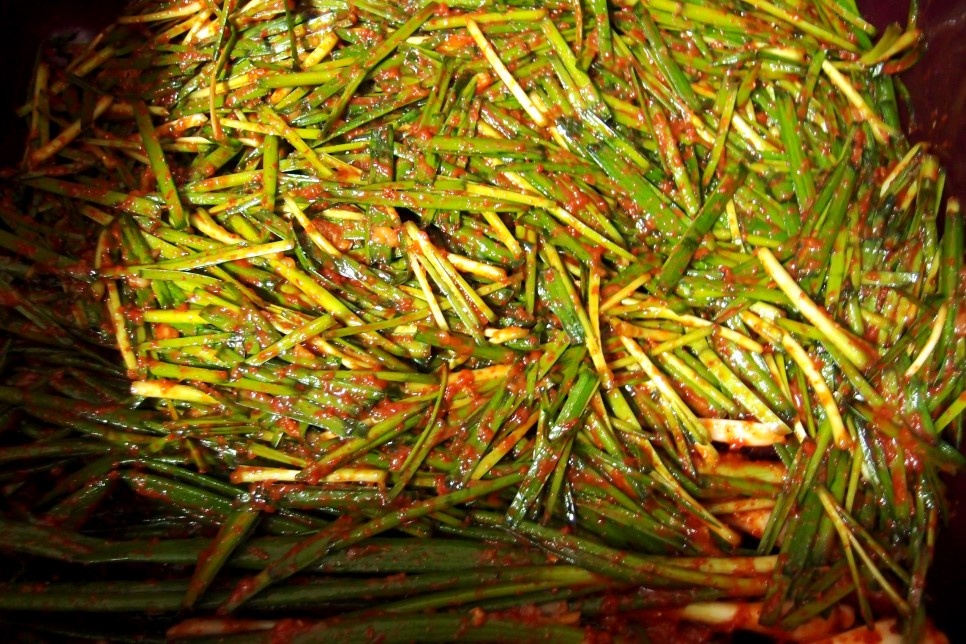 STEP 16/18The last step!!! Pour a little water into a bowl with sauce, add plum juice and anchovy sauce, and mix the seasoning well as if you were washing the dishes. It's in perfect condition if you think it's easy to dip it in. If you think it's bland, add a little salted shrimp and season it.
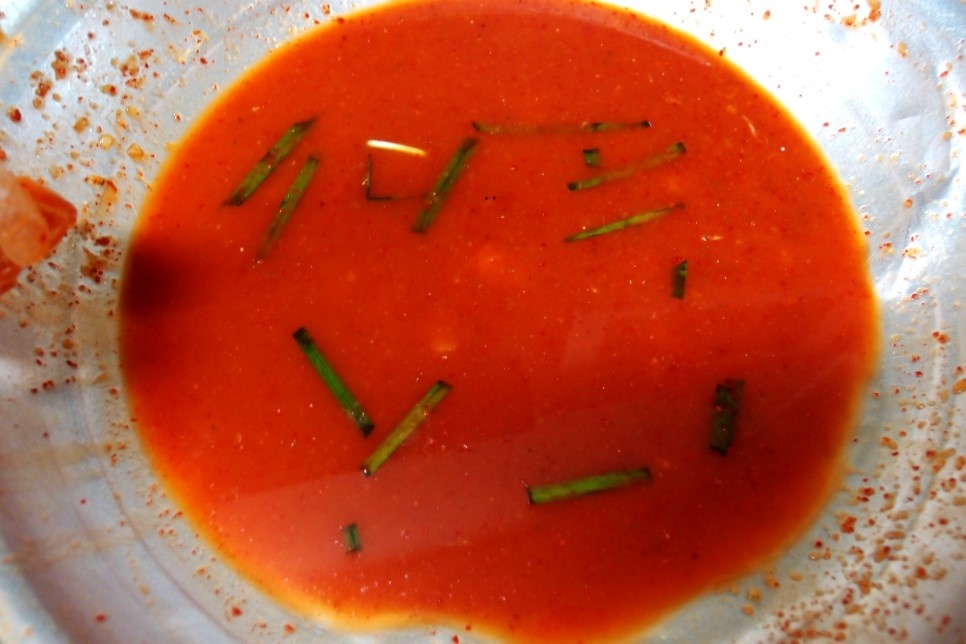 STEP 17/18Pour the water right into the kimchi. And press it again. So that the soup gets soaked well. If you cover the kimchi with a bit of plastic so that the seasoning goes well, it will ferment and make it more mature~~~
 STEP 18/18Now, close the lid of the kimchi container and let it ripen at room temperature for about a day. Rather than putting it in the kimchi refrigerator right away, you can eat kimchi that tastes much better if you age it at room temperature. After a day, when I open the lid and smell it, the air layer is coming up, wriggling. That's what's going on.
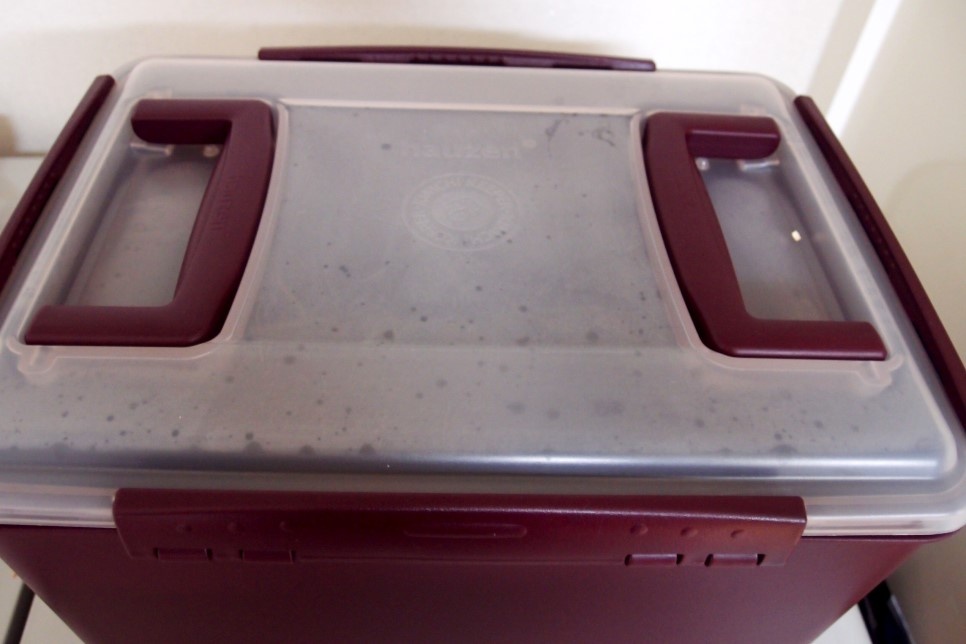 If you put it in the kimchi refrigerator after a day or so and eat it 3-4 days later, the delicious rice thief, chives chives kimchi, is made!!!
- Cooking review
-
5.00score
-
 484*****scoreThere aren't many recipes to make with chives and chives, but thanks to you, I made it well~^^2021-04-09 19:05
-
- Japchae Recommended recipe
-
-
1
 Meatless japchae. Chives japchae4.93(15)
 -
2
 (Drinking at home) Chili Chili Japchae - Home Party / Guest Serv4.97(273)
 -
3
 Golden recipe for japchae (It's not hard to make japchae~!!)4.92(13)
 -
4
Easy and simple japchae that reduces 4.94(50)
-
- stir-fried Rice Cake Recommended recipe
-
-
1
 As expected, Jongwon Baek's golden recipe! Use the leftover rice4.56(32)
 -
2
 In 10 minutes! Soy sauce oil tteokbokki, woong tteok4.90(97)
 -
3
 Ketchup tteokbokki. Making spicy tteokbokki. Eye snacks4.91(55)
 -
4
 Tteokbokki with soup made according to the TV recipe4.79(43)
-